Pinkies Autumn-Winter Catalogue Blog Hop! Feat. Happy Scenes Stamp Set And Hearth & Home Framelits Dies By Stampin’ Up!

Blog hop logo

Thank you for joining us on another Pinkies Blog Hop! We’re showcasing lots of gorgeous projects using products from the new Stampin’ Up!® Autumn/Winter Seasonal Catalogue. Simply use the buttons at the end of each post to keep hopping!

If you arrived here from Swathi blog thank you for stopping by. I hope you enjoy seeing all these beautiful projects and inspirations.

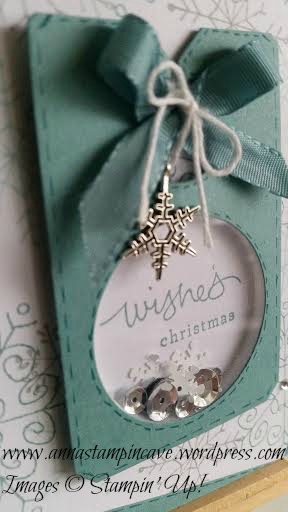
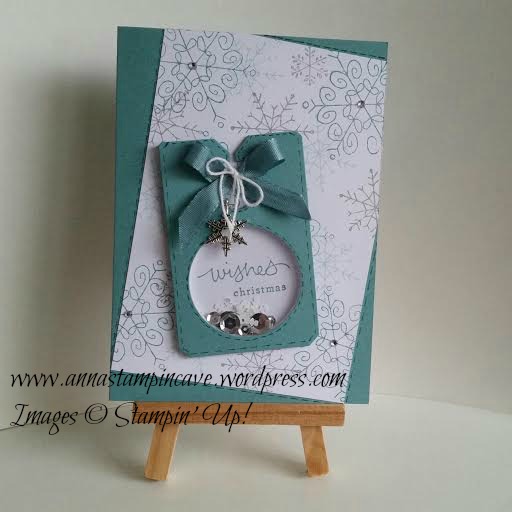
For my project today I’ve used Happy Scenes stamp set with Hearth & Home Thinlits Dies. The moment I saw these in the catalogue I knew I want to make this card. And they come in a bundle too.

Happy Scenes

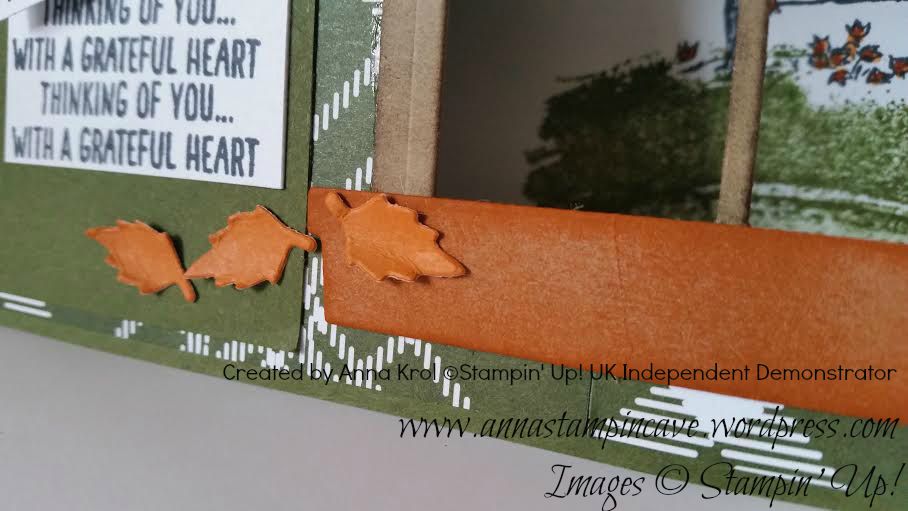
For the base, I chose beautiful Mossy Meadow card stock. I layered it with a piece of DSP from Merry Moments Designer Series Paper Stack. I die-cut window and flower box from a piece of Crumb Cake. I sponged the edges of the window with Early Espresso and flower box is Tangelo Twist, to add some interest. Then, using die-cut, I measured where I want my window to be. I cut out a square in my card base and adhered my window with flower box.

Happy Scenes

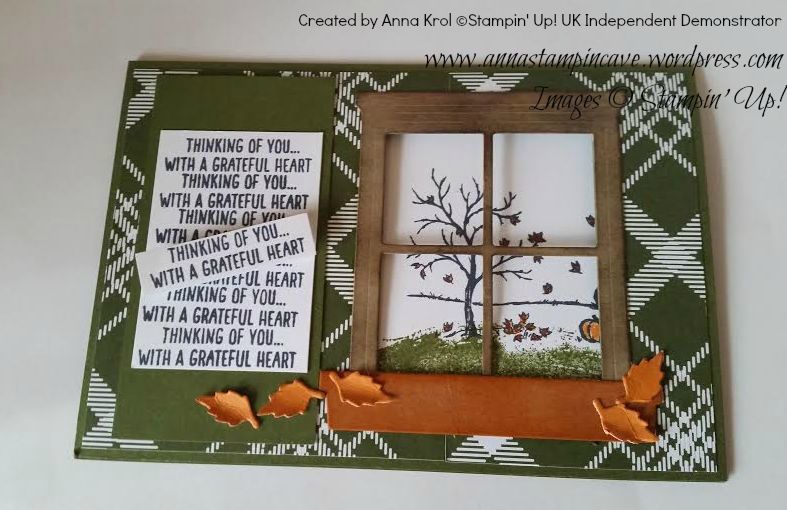
For the inside of the card, I took a piece of Whisper White and stamped my autumn scene from Happy Scenes in Memento Tuxedo Black. I coloured leaves and pumpkins in Pumpkin Pie and Cajun Craze. For the “ground” I used Mossy Meadow ink pad and “swoosh” stamp from Work Of Art. I stamped it off twice for a lighter shade. The sentiment comes from Happy Scenes. I stamped it various times to create a panel. Then I stamped it one more time, cut it out and attached it (slightly crooked) onto the panel using dimensionals.

To finish off my card I die cut tiny leaves using a die from Square Pillow Box Thinlits. I used Whisper White card stock and colour them with Tangelo Twist. Then I crumple my leaves a little bit and glued them to the card.

Happy Scenes

I’m really pleased how my card turned out. It’s super cute. And I’m sure I will use this set many many times.

You can find a complete list of supplies at the very bottom of this post.

Now that you’ve seen my project, be sure to hop along and see more inspiring projects. Next in our hop is amazing Angélique.

Blog hop next

Blog hop previous


Have a blessed weekend!

Endless Wishes And Sequins Shaker Card

Yep. It’s just about a time for me to try something I haven’t tried before 🙂 A shaker card! If I can be honest the idea for this card poped out to me while surfing the internet. I’ve seen so many beautiful shaker cards. And one day it happened I came across gorgeous card by Amy White. I’ve changed some colours used plus instead of punched stars I’ve used silver sequins and white snowflakes by Stampin’ Up.

shaker 1

For the background, same as Amy, I’ve used Endless Wishes. But I chosed Lost Lagoon, Smoky Slate and Soft Sky ink pads. The shaker bit is made from Chalk Talk framelit, piece of window sheet, 1 3/4″ circle punch and the largest of shaker frames. It’s attached to the card with piece of Lost Lagoon Ribbon, Whisper White Bakers Twine and beautiful Snowflake Embellishment which is available in our Autumn/Winter Catalogue.

shaker 2

The background is slightly “kicked” 😉 and attached to the Lost Lagoon base. The fake stiching around the background and shaker is made using Pool Party Stampin’ Marker.

Really hope you like my shaker card with sequins. Thank you for stopping by

Stair Step Card With Festival of Trees

Good evening everyone. It’s Saturday – only week away from us moving a home! Yes, finally 🙂 There was so many things coming out in over a month that I thought it will never happen for us to moving hahaha. But finally everything gets into place. The whole new bathroom suite is waiting to be fixed, floor is bought, new soil pipe is on it’s place and the plumbing work will be finished on Tuesday. Plasterboards are nearly done as well – yay! I will tell you more in a coming week 🙂

Today’s project is not today’s for the true. It’s been waiting to be posted for few days now but always something get me distracted. But because I’ve got free hour or so I thought I will post it tonight 🙂

accordian card 2


I don’t have to tell you I love Festival of Trees by Stampin’ Up! Do I?! 😀 I absolutely adore this stamp set, and I will tell you it’s not the last project I will make using it 🙂

This is simple Stair Step Card. For the base you need piece of card stock that measure 9 x 4 1/8 inches (22.8×10.5 cm). Then score it at 1, 2, 3 4/8, 5, 7 inches  (2.5, 5, 8.9 , 12.8 and 17.8 cm) making “hills and valleys” same as on the picture:

accordian card 1

For two first “stairs” I cut two pieces of card stock that measures as follows: smallest 4 x 1″ (10 x 2.5 cm) and medium piece 4 x 1.5″ (10 x 3.8 cm). I glued them to the base 1/16″ higher then each “stair” starts. In imperial it’s around 2 mm higher. For the last stair I’ve cut the piece of cardstock which measure 4 x 3 4/8″. One half of that piece I run through the Big Shot using the biggest Deco Label. Then I took a piece of Lost Lagoon cs slighty wider and run it through the Big Shot again using the same size Deco Label to make a frame for the sentiment.

I’ve stamped  six different trees using Lost Lagoon, Smoky Slate and Pear Pizzazz. I used different tree designs from Festivals of Trees. Also, for the “chain” stamp, I’ve used Versamark pad making so called resistant stamping technique where you stamp the details with Versamark and then stamp solid image on the top. The image stamped as first will resist the ink from second stamping 🙂 Then I’ve cut all the trees with coordinating punch. At the end I used the trimmer ( you can use scissors too) to shorten all of the trees so each one have different lenght now. I’ve attached them to the card with Tombow glue: three on the smallest stair and three on the medium one.

I took the piece of Whisper White (which I’ve run through the Big Shot before) and using stamp-a-ma-jig and Smoky Slate I’ve stamped the sentiment from Bright & Beautiful stamp set.

accordian card 3

Then I’ve glued the frame and a piece of Lost Lagoon Silky Taffeta Ribbon. To add more interest I’ve tied a little bow. Now I could glue it all to the card. It really looked good. But something seemed to be missing. So I took a strip of Whisper White and I’ve stamped “ho-ho-ho” and “merry christmas” from Good Greetings. For this sentiment I’ve used Lost Lagoon. I glued that strip to the first stair just below trees.

accordian card 4

Et voila – the card is done 🙂 I really think this stamp set is awesome. And even though for this card you can use different colours, different designs of trees or even different sentiments, but it’s still pretty awesome card! Don’t you think?! 🙂 If you like it (or not 😉 ) please leave a comment below.

Thank you for stopping by,