Anna’ Stampin’ Cave – For The Love of Creating – Frosted Floral Suite
Hello and welcome to For the Love of Creating with Stampin’ Up! Blog Hop run by the amazing Australian demonstrator, Kim Oliver. We are super excited to share with you an array of creations showcasing a sneak peek products from 2018 Holiday (Autumn-Winter in the UK) Catalogue.
We hope you find great inspiration from our projects. If you have arrived here from Sandra Mastello, a big welcome to you. You are currently visiting Anna Krol from the United Kingdom.
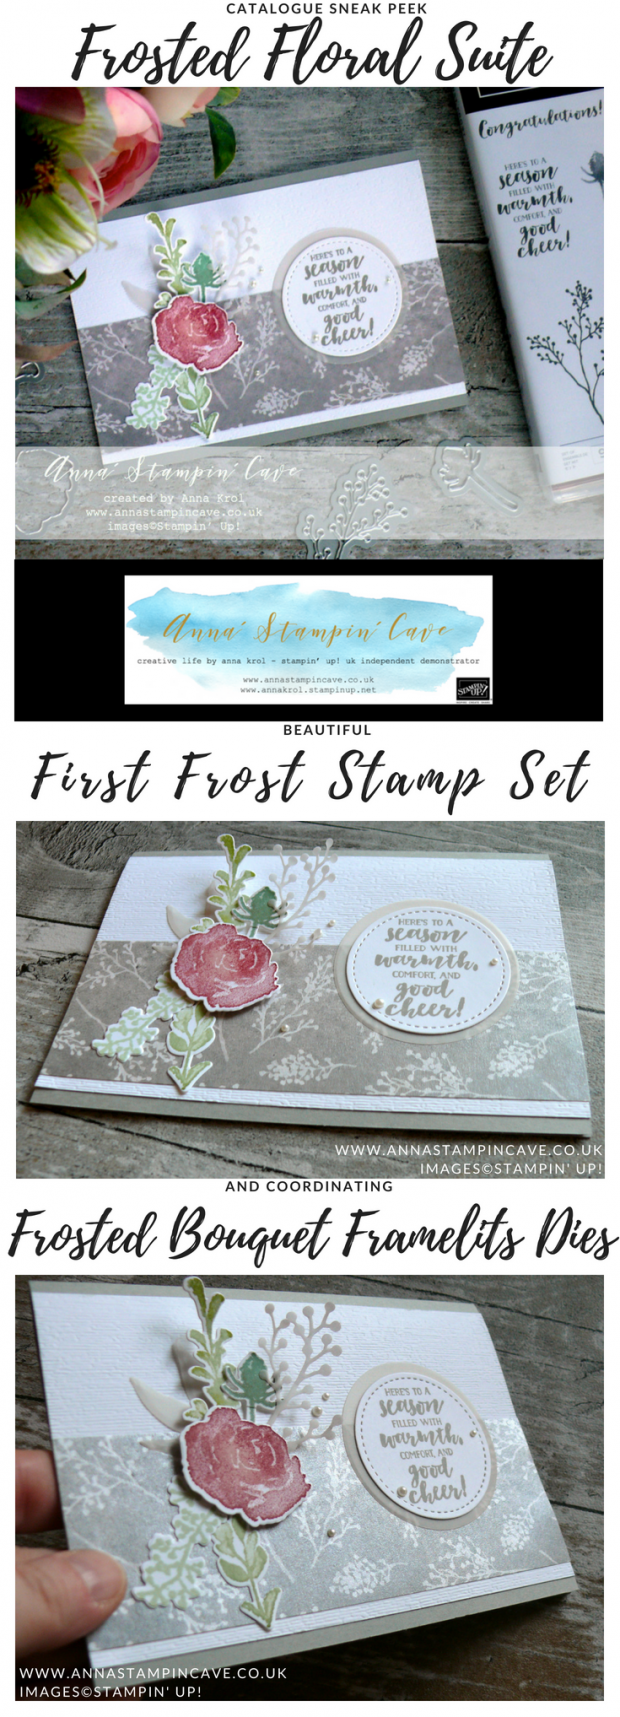
Frosted Floral Suite
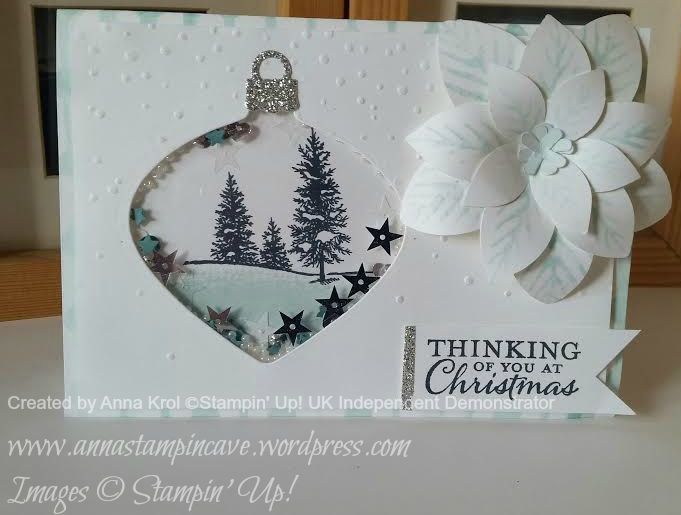
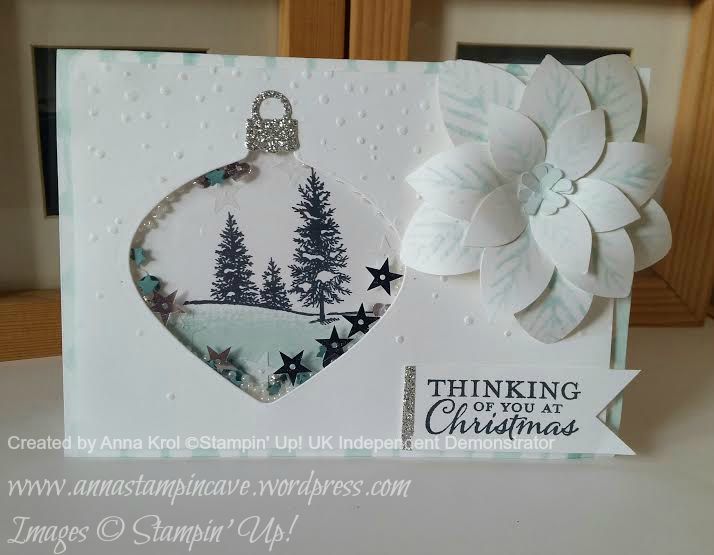
For my projects today I decided to showcase a beautiful suite of products called Frosted Floral Suite.
I did not order the whole suite yet, but enough to showcase a beautiful stamp set with coordinating dies, and unique Designer Series Paper.
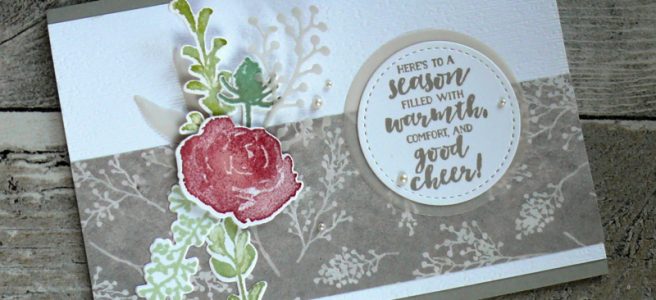
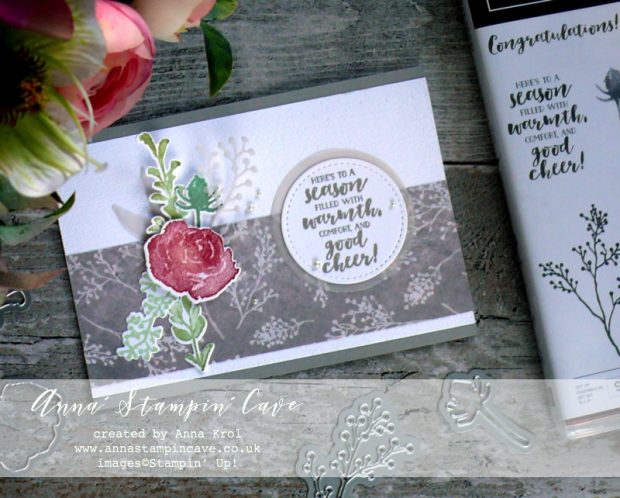
Here’s my card –
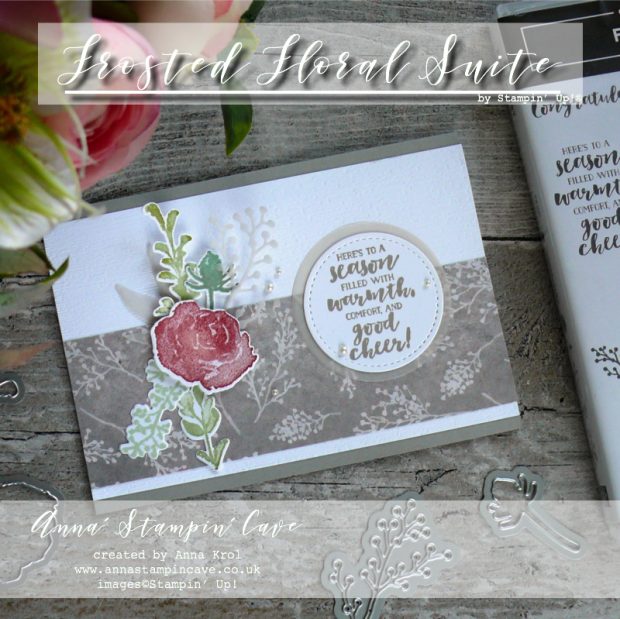
Card dimensions:
- Gray Granite cardstock: 11-6/8″ x 4-1/8″ scored in half at 5-7/8″ (29.7 x 10.5 cm scored in half at 14.8 cm)
- Whisper White panel: 3-3/4″ x 5-7/8″ (9.6 cm x 14.8 cm)
- Whisper White panel (for inside): 4″ x 5-3/4″ (10.2 cm x 14.5 cm)
- Frosted Floral Specialty DSP: 2″ x 5-7/8″
- Whisper White cardstock for sentiment
- Whisper White and Vellum for die-cutting
First, I created my card base. Next, I run my Whisper White panel through the Big Shot using Subtle Dynamic Textured Impressions Embossing Folder. I love this really subtle linen-like texture. I adhered it to the card base.
Frosted Floral Specialty DSP
I’m totally in love with this amazing paper. It’s oh-so-beautiful! Not only because of stunning, handpainted designs. This paper is so yummy and full of shine, like if it was printed on Shimmery White cardstock. What’s more, a girl can wish for?
I picked a neutral Gray Granite design and cut 2″ strip and glued it into the bottom half of my card base.

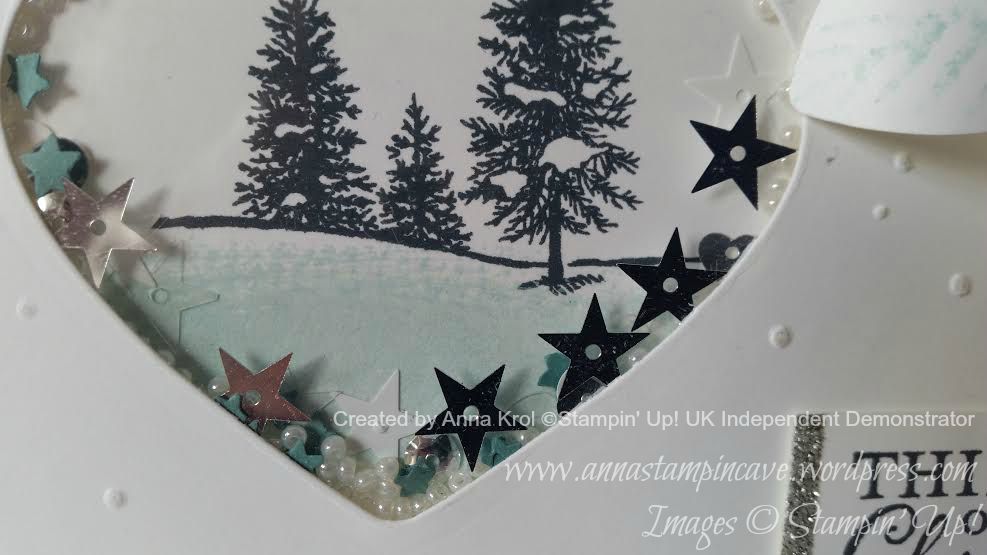
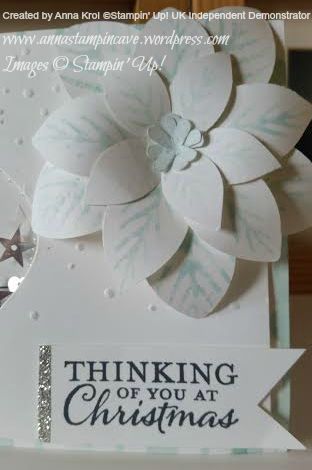
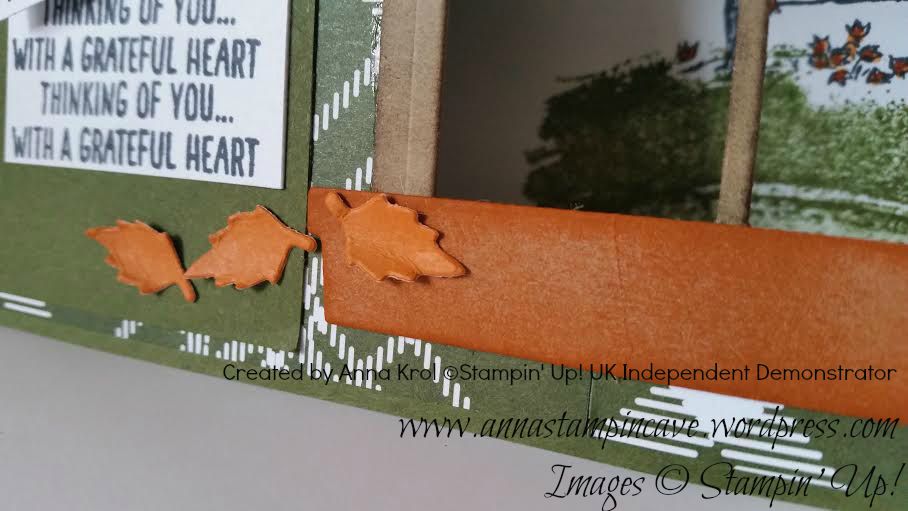
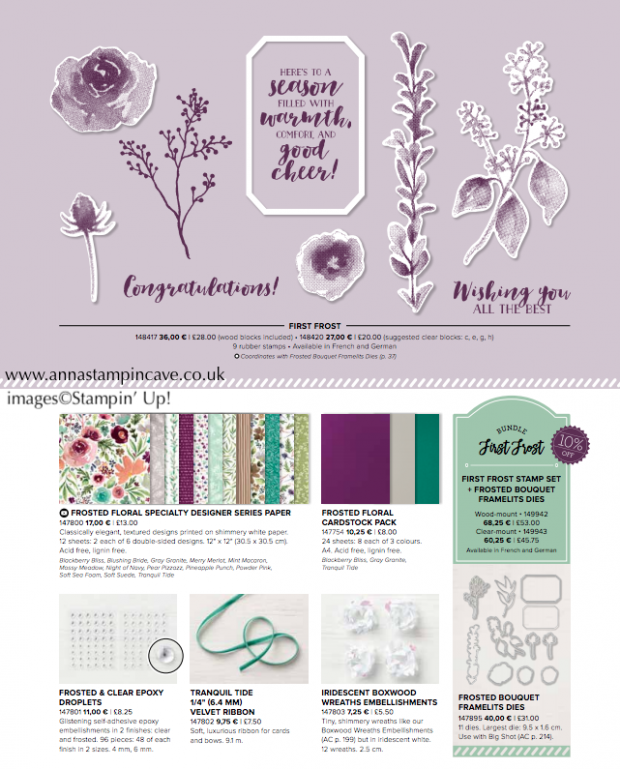
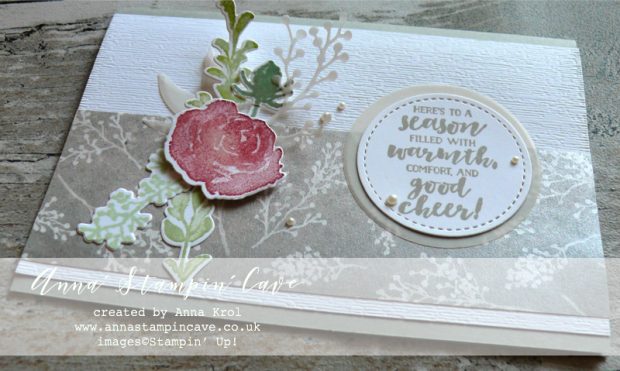
First Frost Bundle
Just as a breathtaking is designer paper, a First Frost Stamp Set and coordinating Frosted Bouquet Framelits Dies are equally beautiful.
I’ve used Stamparatus to stamp my images onto Whisper White cardstock, and die-cut them with matching dies. I also die-cut a few images from vellum.
I played with arranging my die-cuts to decide how I wanted them to go on the card and I snap a photo for a reference. Using either liquid glue, snail adhesive or dimensionals – I added all my pieces to the card.
I die-cut a circle using second smallest circle from Stitched Shapes Framelits Dies and stamped my sentiment using Gray Granite ink. I also die-cut a slightly bigger vellum circle cut using Layered Circles Framelits Dies (approx 2-1/8″ – 5.4 cm). I adhered them together and mount it onto my card. Few Basic Pearls finish off my card.
I hope you enjoyed coming to my blog today and now, be sure to hop along and see more inspiring projects.
Below is the list of all the participants but you can also use the buttons to keep hopping. Your next stop is lovely Margriet Siekman from the Netherlands – go and see her beautiful projects
As always, if you wish to purchase any of the products I have used, simply click the images below to go directly to my online store.
HOST CODE for the month of AUGUST is U6KK4ACY. Orders of £50+ (excl. p&p) will receive a pack of Stampin’ Up! Pearlised Doilies!


Product List
|
|
|
|
|
|
|
|
|
|
|
|
|
|
|
|||
|
|
||||
|
|
|
|
|


 Specialty Designer Series Paper")


Pin me
Summary of the project which gives all the views of the card in one photo. I’d love if you pinned and called by on Pinterest xx
Don’t forget to check:
 My exclusive special offer this month only: FREE Stampin’ Up! Pearlised Doilies
How it works…
- Place a product order of £50 or more (excl. shipping) in my online store in the month of August.
- Add Host Code U6KK4ACY. To claim your reward you must include this code in your ordering process.
- This August Special Offer will be applied to all qualifying orders placed through my shop using Host Code U6KK4ACY between 1 August – 31 August.
- If your order is £150 or more do not use Host Code. You will earn your own Host Rewards to spend.
- IMPORTANT: My FREE Special Host Gift giveaways are mailed separately from any order and will arrive mid-September.
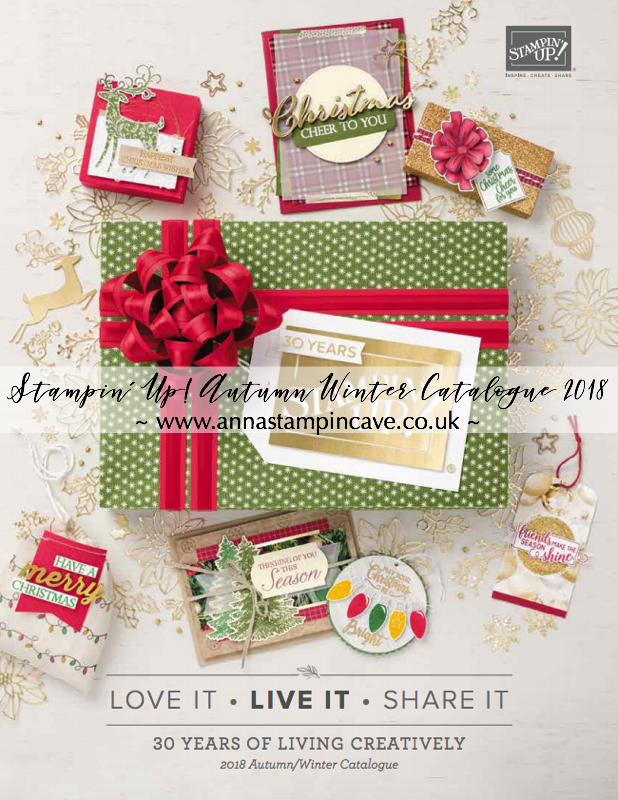
Request Autumn/Winter Catalogue
 Earn in August – redeem in September –> click here for more details

All-new, limited-time Colour Your Season products – Products available while supplies last or until 31 August 2018 – order yours today –> click here