
I’m Sorry For Being Absent

Anna’ Stampin’ Cave – I’m sorry for being absent.

Hi Loves! I’m sorry for being absent!

I know it’s been a while, shame on me!

The fabulous Autumn/Winter 2018 Catalogue launched on 5th September but with my health, things have taken a bit of a turn. But I tried since a couple of days to update the links and Autumn-Winter Catalogue pageAnd I will keep updating my blog gradually.

As many of you know, I’ve got Multiple Sclerosis and like with everything MS, the symptoms can vary from sufferer to sufferer. Some of us have symptoms so seriously affecting their everyday life, they end up in a wheelchair, unable to walk or carrying for themselves, others are blessed enough they can continue with their lives as usual with no symptoms at all.

My MS struggles

Well, I’m somewhere in between. My hands are numb, I suffer from chronic pain. I also have a discopathy (it’s a Polish terminology) or how it’s called here: spinal disc herniation (which is probably caused by inflammation caused by MS) – two bottom discs of my spine have degenerated and are causing me severe sharp pain and difficulty with moving around.
But I’m not giving up. I just listen to my body and do as much as it allows me to.b And if it means fewer and unplanned posts – let it be. I hope you understand.

But I do keep up with all my commitments towards my customers, so you are welcome to shop through my page. All qualified gifts will be sent as per usual.

Exclusive PDF Tutorials

HOST CODE for the month of September is TAXBTP9Q.
Orders of £50+ (excl. p&p) will receive from me:

  • a pack of Chicken Wire Elements
  • Exclusive PDF Tutorials for three cards 

How it works…

  • Place a product order of £50 or more (excl. shipping) in my online store in the month of September. 
  • Add Host Code TAXBTP9Q. To claim your reward you must include this code in your ordering process.
  • This August Special Offer will be applied to all qualifying orders placed through my shop using Host Code TAXBTP9Q between 1 September – 30 September.
  • If your order is £150 or more do not use Host Code. You will earn your own Host Rewards to spend.
  • IMPORTANT:  My FREE Special Host Gift giveaways are mailed separately from any order and will arrive mid-October.
  • PDF’s will be emailed the same or next day (depends on the time of your purchase). They will include the photos of the finished cards, list of products used and step by step instructions.

One last thing: Stampin’ Up! and papercraft is my passion and I’m not planning to stop doing what I love!

Thank you for stopping by and have a blessed day,


Don’t forget to check:
Host Promotion Details

  • Promotion period: 1–30 September
  • Dashing Along Designer Series Paper is exclusive to the host promotion and will not be available after 30 September.
  • In order to qualify, the event merchandise total must reach 275 €/£200 (catalogue price before shipping and handling).
  • One package of Designer Series Paper may be redeemed per qualifying order, with no limit on how many qualifying orders can be placed in September.
  • Demonstrator, Customer, Workshop, and online orders qualify.
  • Dashing Along Designer Series Paper may not be redeemed using Stampin’ Rewards. Customers will receive this FREE gift with a qualifying order in addition to any Stampin’ Rewards they may earn.
  • Dashing Along Designer Series Paper may not be exchanged for other paper.

International Highlights Winners Hop: You Are The Greatest

Anna’ Stampin’ Cave – International Highlights Winners Hop: You Are The Greatest

Hello and welcome to my stampin’ cave today.

First of all, I wanted to say a massive THANK YOU to all my followers and visitors to my blog for VOTING on my project for this month’s International Project Highlights! My little fridge magnet and card took the 5th place. I’m so humbled!

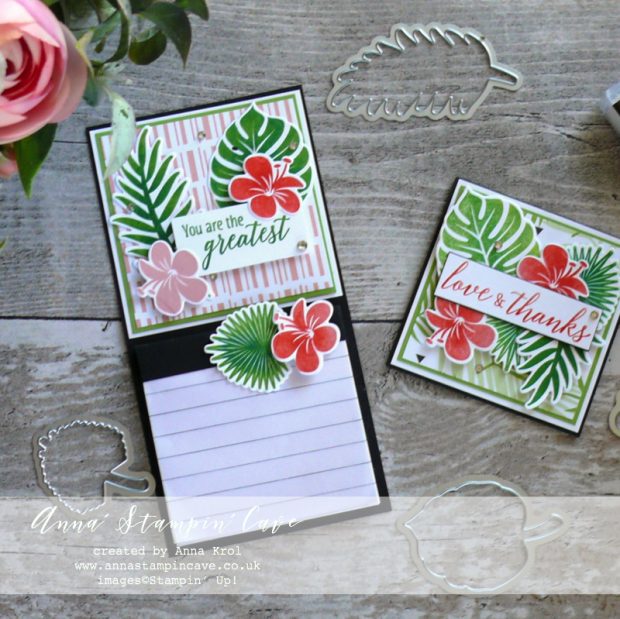
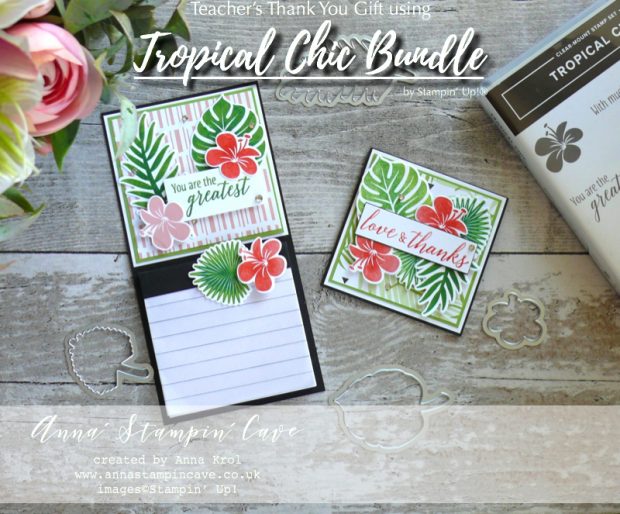
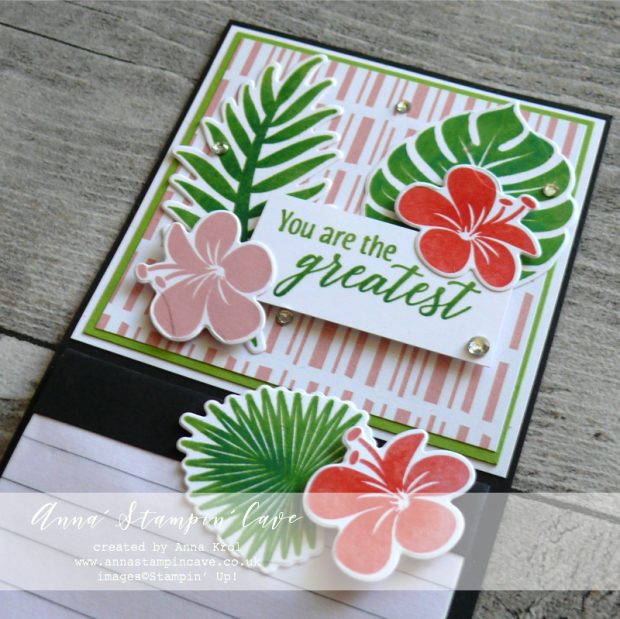
Anna' Stampin' Cave - Teacher's Thank You Gift Fridge Magnet and Thank You card using Tropical Chic Stamp Set and Tropical Thinlits Dies from Stampin' Up!

Every month, the ‘top ten’ get to blog hop with Kylie, using the same theme, which was a “Teachers Gifts”.

You Are The Greatest

For today’s project, I decided to go back to one of my favourite products and techniques – watercolour with Brusho® Crystal Colour.

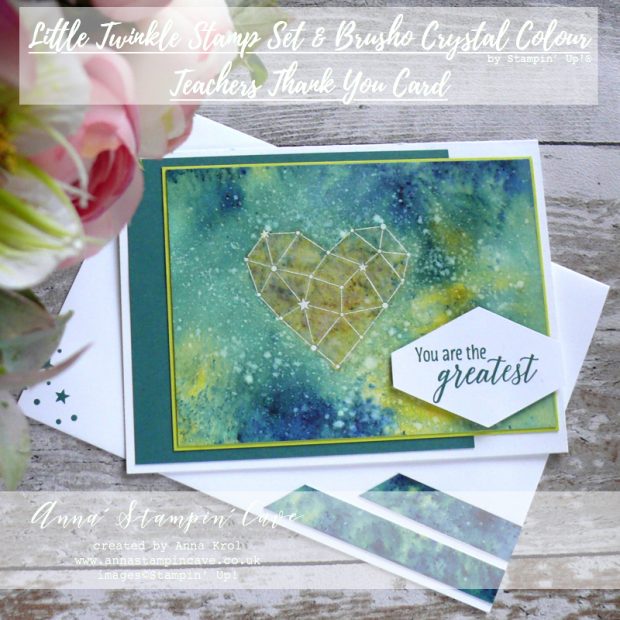
Here’s my card –

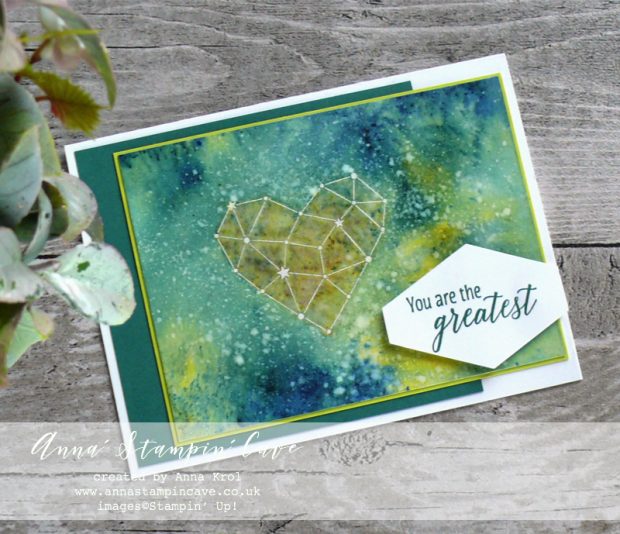
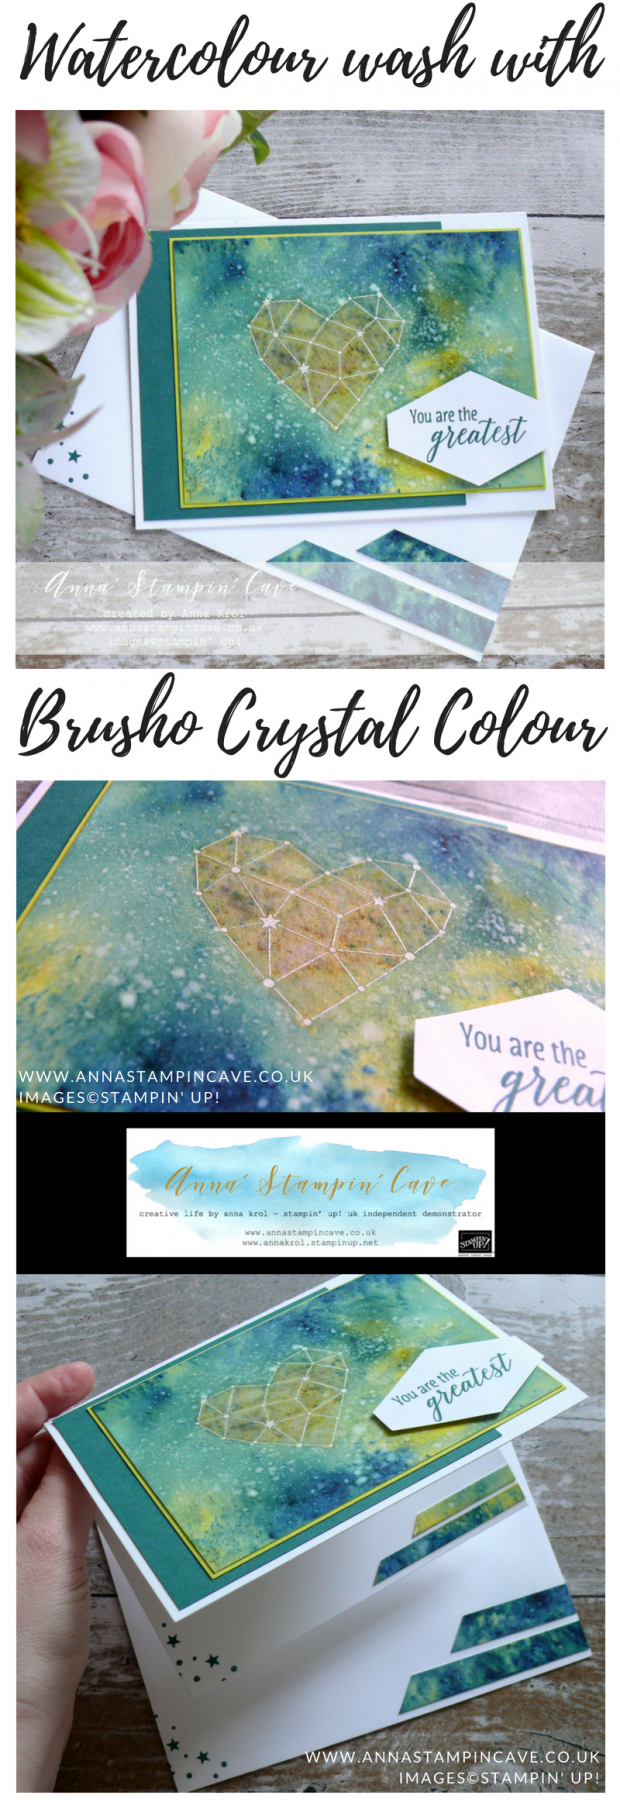
Anna' Stampin' Cave - Teachers Thank You Card with Watercolour Wash using Brusho Crystal Colour, Little Twinkle Stamp Set & Tropical Chic Stamp Set from Stampin' Up!

Card dimensions:

  • Whisper White Thick cardstock: 11-6/8″ x 4-1/8″ scored in half at 5-7/8″ (29.7 x 10.5 cm scored in half at 14.8 cm)
  • Tranquil Tide cardstock panel: 3-7/8″ x 4-1/4″ (9.8 cm x 10.6 cm)
  • Lemon Lime Twist cardstock panel: 3-5/8″ x 5-13/16″ (9.2 cm x 12.2 cm)
  • Watercolour Paper panel: 3-1/2″ x 5-3/4″ (9 cm x 12 cm)
  • Whisper White cardstock for sentiment

My thought behind this card was to create one that could be suitable either for a female or male teacher.

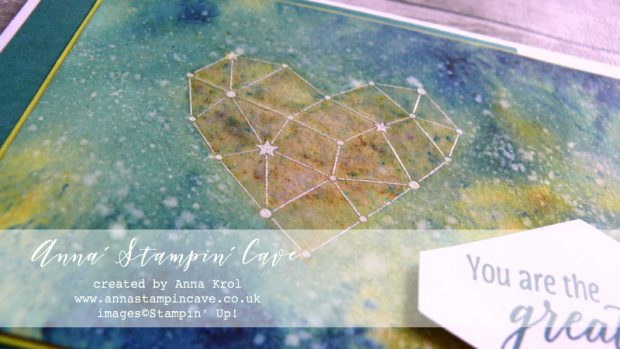
I prepared my watercolour panel – it was bit larger than what I needed – with embossing buddy and stamped the ‘heart constellation’ using Versamark ink. I sprinkled it with a White Emboss Powder and heat set it with my Heat Tool.

When heat embossing on Watercolor Paper, because it’s a quite porous surface, you need to make sure all the image has transferred very well. It can take a little bit longer for the embossing powder to melt, so be patient.

Anna' Stampin' Cave - Teachers Thank You Card with Watercolour Wash using Brusho Crystal Colour, Little Twinkle Stamp Set & Tropical Chic Stamp Set from Stampin' Up!

Brusho Crystal Colour

They are high quality and highly pigmented paint powders. They are water-based and most of all completely non-toxic. For my card, I chose two colours to work with: Prussian Blue and Moss Green.

I added my water to the embossed heart, sprinkled it with Moss Green and using the aqua painter I moved the water around.

Before adding Prussian Blue I wet the panel under a running water. I wasn’t too concerned and didn’t worry too much that the Mossy Green will run. Once my panel was really wet I sprinkled it richly with Prussian Blue.

I moved the colour tilting the panel in each direction dabbing off any colour that got into the heart – I wanted to keep it green. Once my panel was dry I spritz it with water (very selectively avoiding the heart) and added more Prussian Blue with a few Moss Green areas for the contrast and moved it around with aqua painter again. Once happy with results, and when the panel was still slightly damp, I sprinkled some more of Prussian Blue and let it dry without moving the paper. I love the effect it left on the panel.
Anna' Stampin' Cave - Teachers Thank You Card with Watercolour Wash using Brusho Crystal Colour, Little Twinkle Stamp Set & Tropical Chic Stamp Set from Stampin' Up!

Assembling the card

For the final touch, I took a Whisper White Craft Ink Refill and with a help of clear block and aqua painter, I splashed white all over the panel.

Once my panel was dry I cut it to the size but I saved my colourful off cuts to use them later for some accents.

I adhered Tranquil Tide panel to the card base with liquid glue. Next, I mounted watercolour piece onto a Lemon Lime Twist panel and adhered them both to the base.

The sentiment comes from Tropical Chic Stamp Set. I stamped it in Tranquil Tide ink and punched out with Tailored Tag Punch. I have added it to my card with few dimensionals.

Final touches

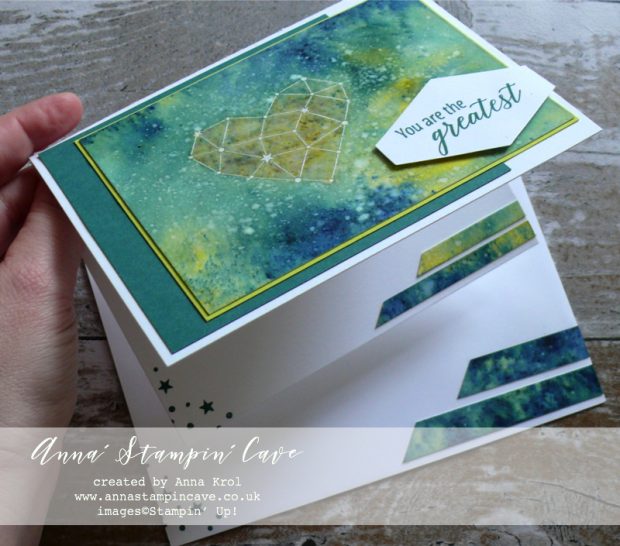
For some interest, I stamped a cluster of stars inside of my card, in a bottom left corner. Besides that, I also took one of the watercolour strips that left, cut it at an angle and add it to the inside as well. I think it looks pretty cool.

Anna' Stampin' Cave - Teachers Thank You Card with Watercolour Wash using Brusho Crystal Colour, Little Twinkle Stamp Set & Tropical Chic Stamp Set from Stampin' Up!

I also decided to decorate the envelope with the same elements as the inside of my card: clusters of stars and another watercolour strip cut at an angle.

And that’s it from me for today. I hope you’ve enjoyed visiting my blog. Do you like the card I created? I would love to hear your thoughts.

Below is the list of all the winners, so be sure to hop along. Your next stop is lovely and very talented Janneke de Jong from the Netherlands  go and see her beautiful project.

As always, if you wish to purchase any of the products I have used, simply click the images below to go directly to my online store.

I add this card to:

HOST CODE for the month of AUGUST is U6KK4ACY. Orders of £50+ (excl. p&p) will receive a pack of Stampin’ Up! Pearlised Doilies!

Product List

Bone Folder

£6.25

Aqua Painters

£15.50

Pin me

Summary of the project which gives all the views of the card in one photo. I’d love if you pinned and called by on Pinterest xx

Anna' Stampin' Cave - Teachers Thank You Card with Watercolour Wash using Brusho Crystal Colour, Little Twinkle Stamp Set & Tropical Chic Stamp Set from Stampin' Up!


Don’t forget to check:

My exclusive special offer this month only: FREE Stampin’ Up! Pearlised Doilies

How it works…

  • Place a product order of £50 or more (excl. shipping) in my online store in the month of August. 
  • Add Host Code U6KK4ACY. To claim your reward you must include this code in your ordering process.
  • This August Special Offer will be applied to all qualifying orders placed through my shop using Host Code U6KK4ACY between 1 August – 31 August.
  • If your order is £150 or more do not use Host Code. You will earn your own Host Rewards to spend.
  • IMPORTANT:  My FREE Special Host Gift giveaways are mailed separately from any order and will arrive mid-September.

    Request Autumn/Winter Catalogue

    Stampin' Up! Autumn Winter 2018 Catalogue


    Earn in August – redeem in September –> click here for more details

    All-new, limited-time Colour Your Season products – Products available while supplies last or until 31 August 2018 – order yours today –> click here

Teachers Thank You Gift Using Stampin’ Up! Tropical Chic Bundle

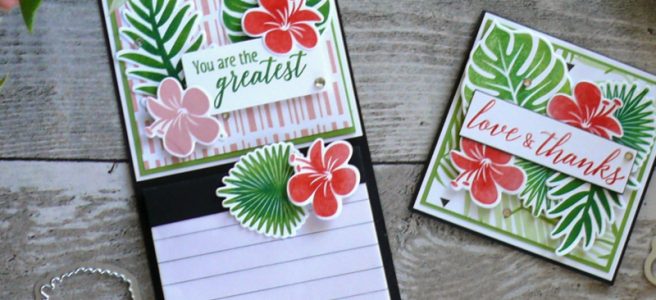
Anna' Stampin' Cave - Teacher's Thank You Gift Fridge Magnet and Thank You card using Tropical Chic Stamp Set and Tropical Thinlits Dies from Stampin' Up!

Anna’ Stampin’ Cave – Teachers Thank You Gift Using Tropical Chic Bundle

Thanks for coming to my blog today! We are being highlighted internationally by Kylie Bertucci and you are able to vote for my project. The top ten winners will get to be part of an international blog hop so please vote for my project. My project is under the number 20. You can do it here or use a button at the end of my post.

A theme for this month’s highlight is ‘Teachers Gifts’. And however, it’s been a long time since our daughter finished primary school (she starts Uni after summer break) I thought why not make a cute little set of a fancy fridge magnet and a mini 3×3″ Thank You card.

To make these I’ve used Stampin’ Up! Tropical Chic Stamp Set & Tropical Thinlits Dies. I also used coordinating Tropical Escape DSP.

Anna' Stampin' Cave - Teacher's Thank You Gift Fridge Magnet and Thank You card using Tropical Chic Stamp Set and Tropical Thinlits Dies from Stampin' Up!

Teachers Gift Fridge Magnet dimensions:

  • Basic Black cardstock for the base: 3-1/4″ x 6-1/2″
  • Basic Black cardstock for the notebook: 1-1/2″ x 3″
  • Whisper White cardstock: 3-1/8″ x 3-1/8″
  • Granny Apple Green cardstock: 3″ x 3″
  • Tropical Escape DSP: 2-7/8″ x 2-7/8″
  • Whisper White cardstock for stamping & die-cutting
  • Rhinestones
  • magnet sheet 3″ x 4″

Teachers Thank You Card dimensions:

  • Basic Black cardstock: 3″ x 6″
  • 2x Whisper White cardstock: 2-7/8″ x 2-7/8″
  • Granny Apple Green cardstock: 2-6/8″ x 2-6/8″
  • Tropical Escape DSP: 2-5/8″ x 2-5/8″
  • Whisper White cardstock for stamping & die-cutting
  • Rhinestones

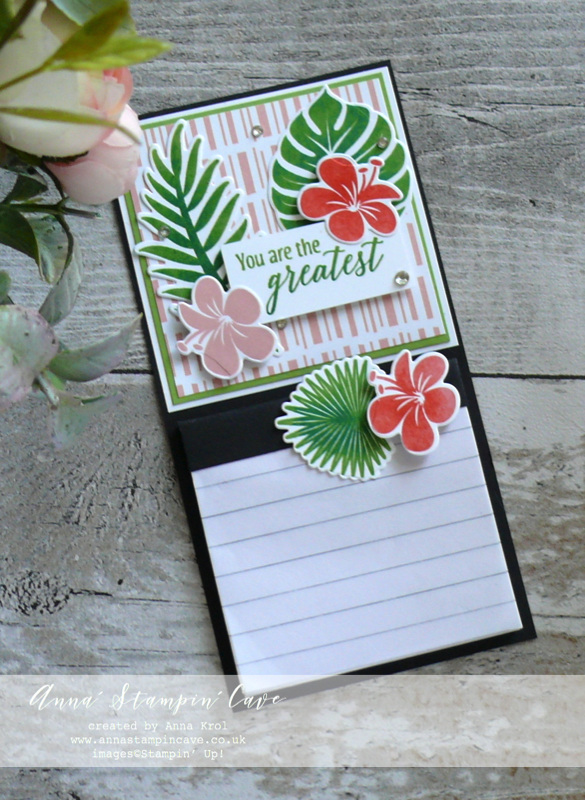
Anna' Stampin' Cave Teacher's Thank You Gift Fridge Magnet using Tropical Chic Stamp Set and Tropical Thinlits Dies from Stampin' Up!

First, I created the base for my magnet: I cut Basic Black cardstock to 3-1/4″ x 6-1/2″ and using liquid glue I adhered the magnetic sheet at the back. Next, I created the notes area. I have found this little notebook in my drawer but it had a navy spine and was a little too long (3″ x 4″) and I needed a square one. So I removed the old spine and shortened notebook using the guillotine.

To create new spine I cut a 1-1/2″ x 3″ piece of Basic Black cardstock and scored it at 7/8″ and 1″. Adhered it to the notebook and adhered notebook to the base.Anna' Stampin' Cave Teacher's Thank You Gift Fridge Magnet using Tropical Chic Stamp Set and Tropical Thinlits Dies from Stampin' Up!

To finish off the top of my magnet, I took a Whisper White cardstock square, glued Granny Apple Green on top and layered a slightly smaller square of Tropical Escape DSP and adhered them all to the base.

For stamping the foliage I’ve used Stamparatus: I stamped each greenery image in Granny Apple Green ink, followed by Shaded Spruce but dabbed off some colour from the edges of the images.

I did the same with flowers but I used Blushing Bride with Poppy Parade. I decided to leave one flower just in Blushing Bride. I die cut all my images using coordinating dies, arranged and adhered them to the magnet using liquid glue and dimensionals.

For the sentiment, again, I’ve used Granny Apple Green with Shaded Spruce.

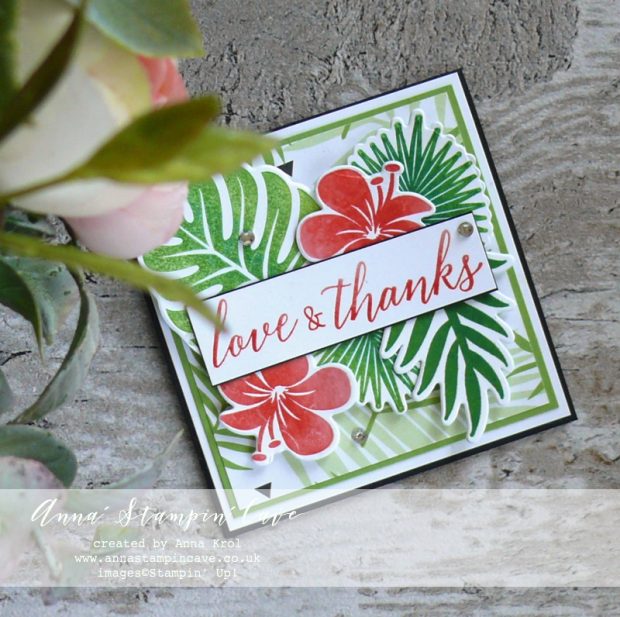
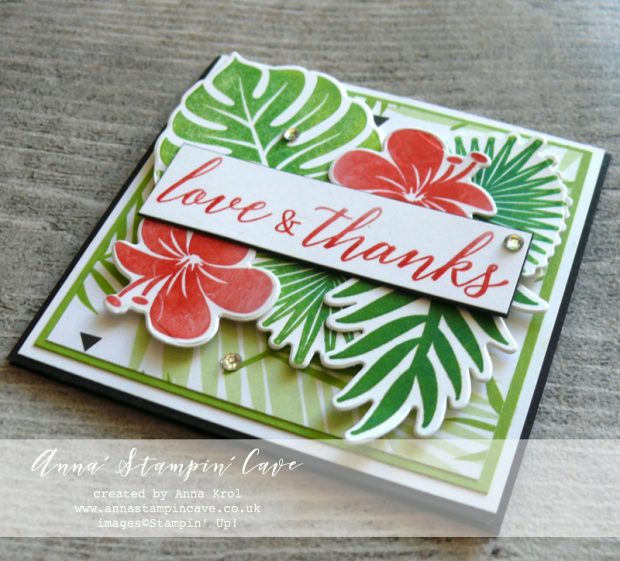
Anna' Stampin' Cave - Teachers Thank You card using Tropical Chic Stamp Set and Tropical Thinlits Dies from Stampin' Up!

For the card, I’ve used a 3″ x 6″ piece of Basic Black, scored at 3″. Same as with a magnet piece, I layered Whisper White with Granny Apple Geen and Tropical Escape DSP on top and adhered them all to the card base.

Anna' Stampin' Cave - Teacher's Thank You Gift Fridge Magnet and Thank You card using Tropical Chic Stamp Set and Tropical Thinlits Dies from Stampin' Up!

Using Stamparatus, again, I stamped each of my images and die cut them using coordinating dies.

The sentiment comes from the same stamp set but I stamped only ‘Love & Thanks’ with Blushing Bride at full strength and Poppy Parade dabbed off for gradient look.

Few rhinestones finish off my little projects.

I truly hope you’ve enjoyed coming to my blog today.

Now, make sure you head over to Kylie’s blog to check all lovely projects and vote for your favourites. Hope my project will be among them. My project is under number 20!

As always, if you wish to purchase any of the products I have used, simply click the images below to go directly to my online store.

My exclusive special offer this month only: FREE Stampin’ Up! Pearlised Doilies

How it works…

  • Place a product order of £50 or more (excl. shipping) in my online store in the month of August. 
  • Add Host Code U6KK4ACY. To claim your reward you must include this code in your ordering process.
  • This August Special Offer will be applied to all qualifying orders placed through my shop using Host Code U6KK4ACY between 1 August – 31 August.
  • If your order is £150 or more do not use Host Code. You will earn your own Host Rewards to spend.
  • IMPORTANT:  My FREE Special Host Gift giveaways are mailed separately from any order and will arrive mid-September.

Stamparatus

£46.00

Big Shot

£102.00

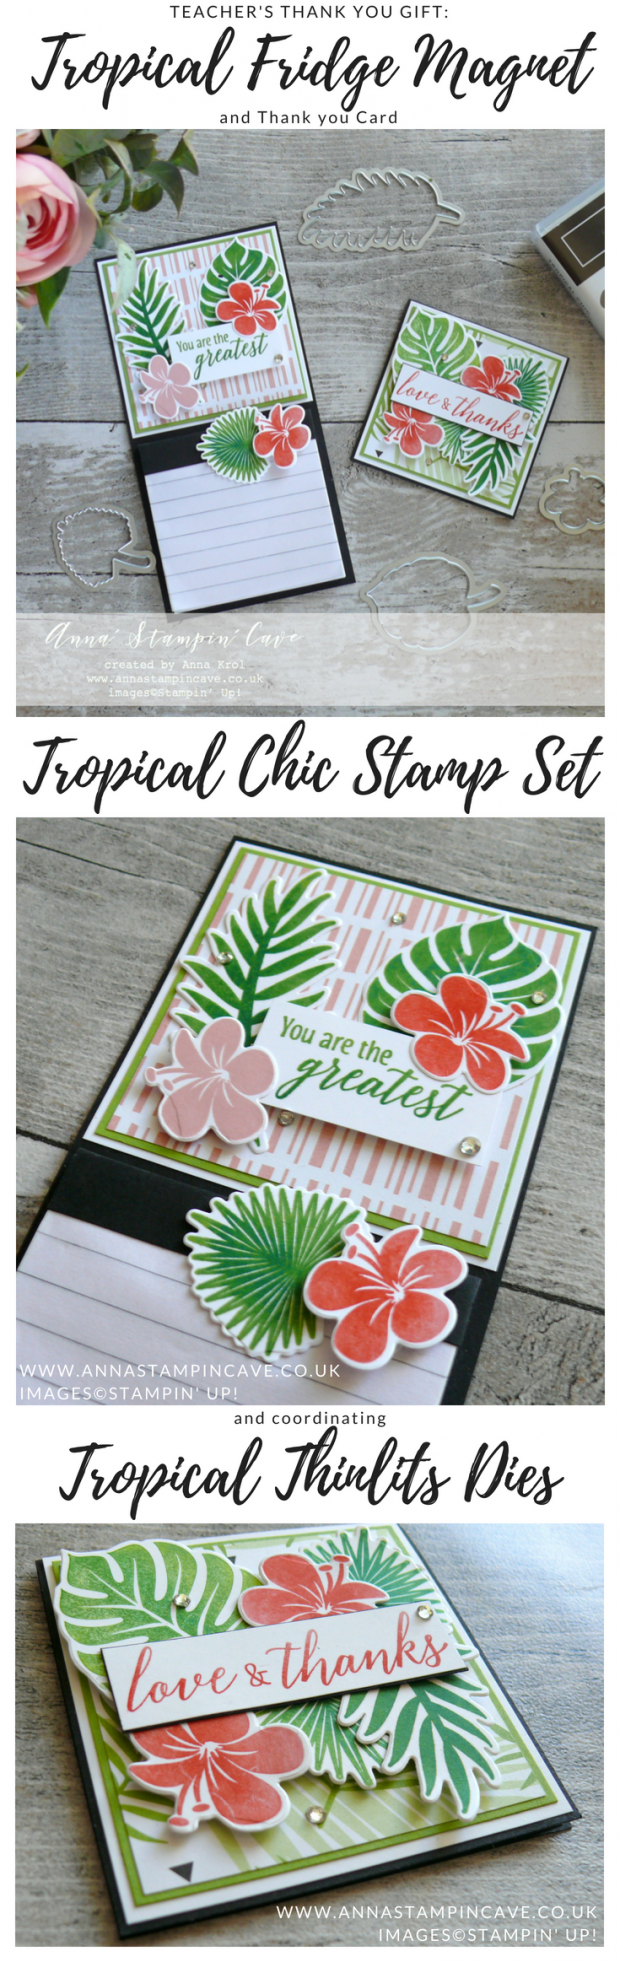
Pin me

Summary of the project which gives all the views of the card in one photo. I’d love if you pinned and called by on Pinterest xx

Anna' Stampin' Cave - Teacher's Thank You Gift Fridge Magnet and Thank You card using Tropical Chic Stamp Set and Tropical Thinlits Dies from Stampin' Up!

DON’T FORGET TO CHECK

Request Autumn/Winter Catalogue below –

Stampin' Up! Autumn Winter 2018 Catalogue

How can you get a FREE copy of the new Autumn/Winter 2018 Catalogue?

For those living in the UK and Northern Ireland, you may request a catalogue using the form below and I will add you to my mailing list for this catalogue.

You can also opt-in to receive my customer email newsletter, featuring tips, product shares, news of Stampin’ Up! specials and my personal promotions.

  • Do not forget to give your full address
  • It’s open to the United Kingdom and Northern Ireland only.

Earn in August – redeem in September –> click here for more details
All-new, limited-time Colour Your Season products – Products available while supplies last or until 31 August 2018 – order yours today –> click here

New Stitched Shapes Framelits Dies

Anna’ Stampin’ Cave – New Stitched Shapes Framelits Dies

anna-stampin-cave-stitched-shapes-framelits-dies-by-stampin-up

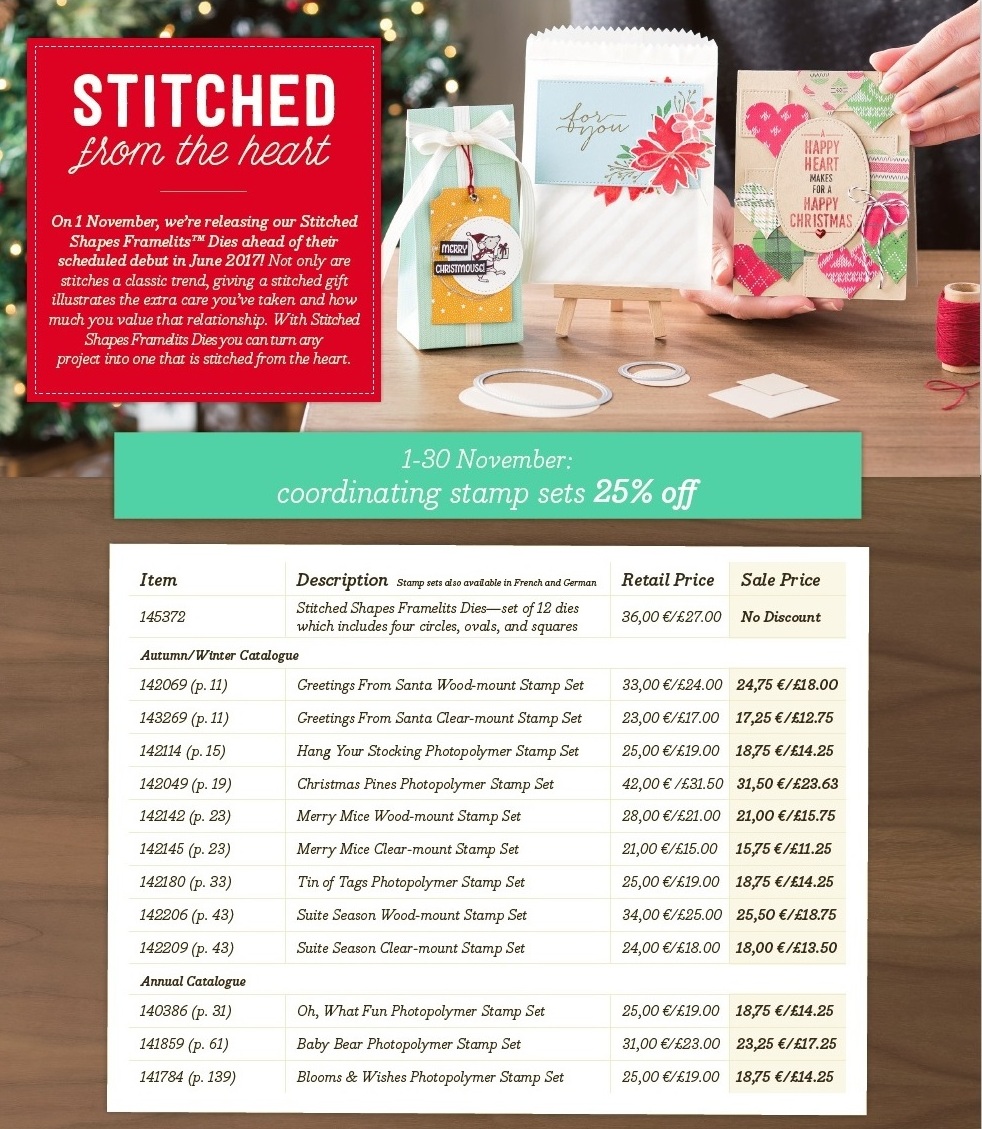
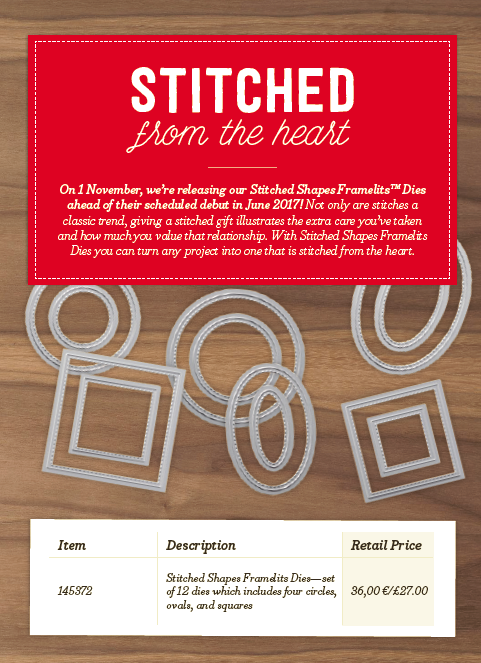
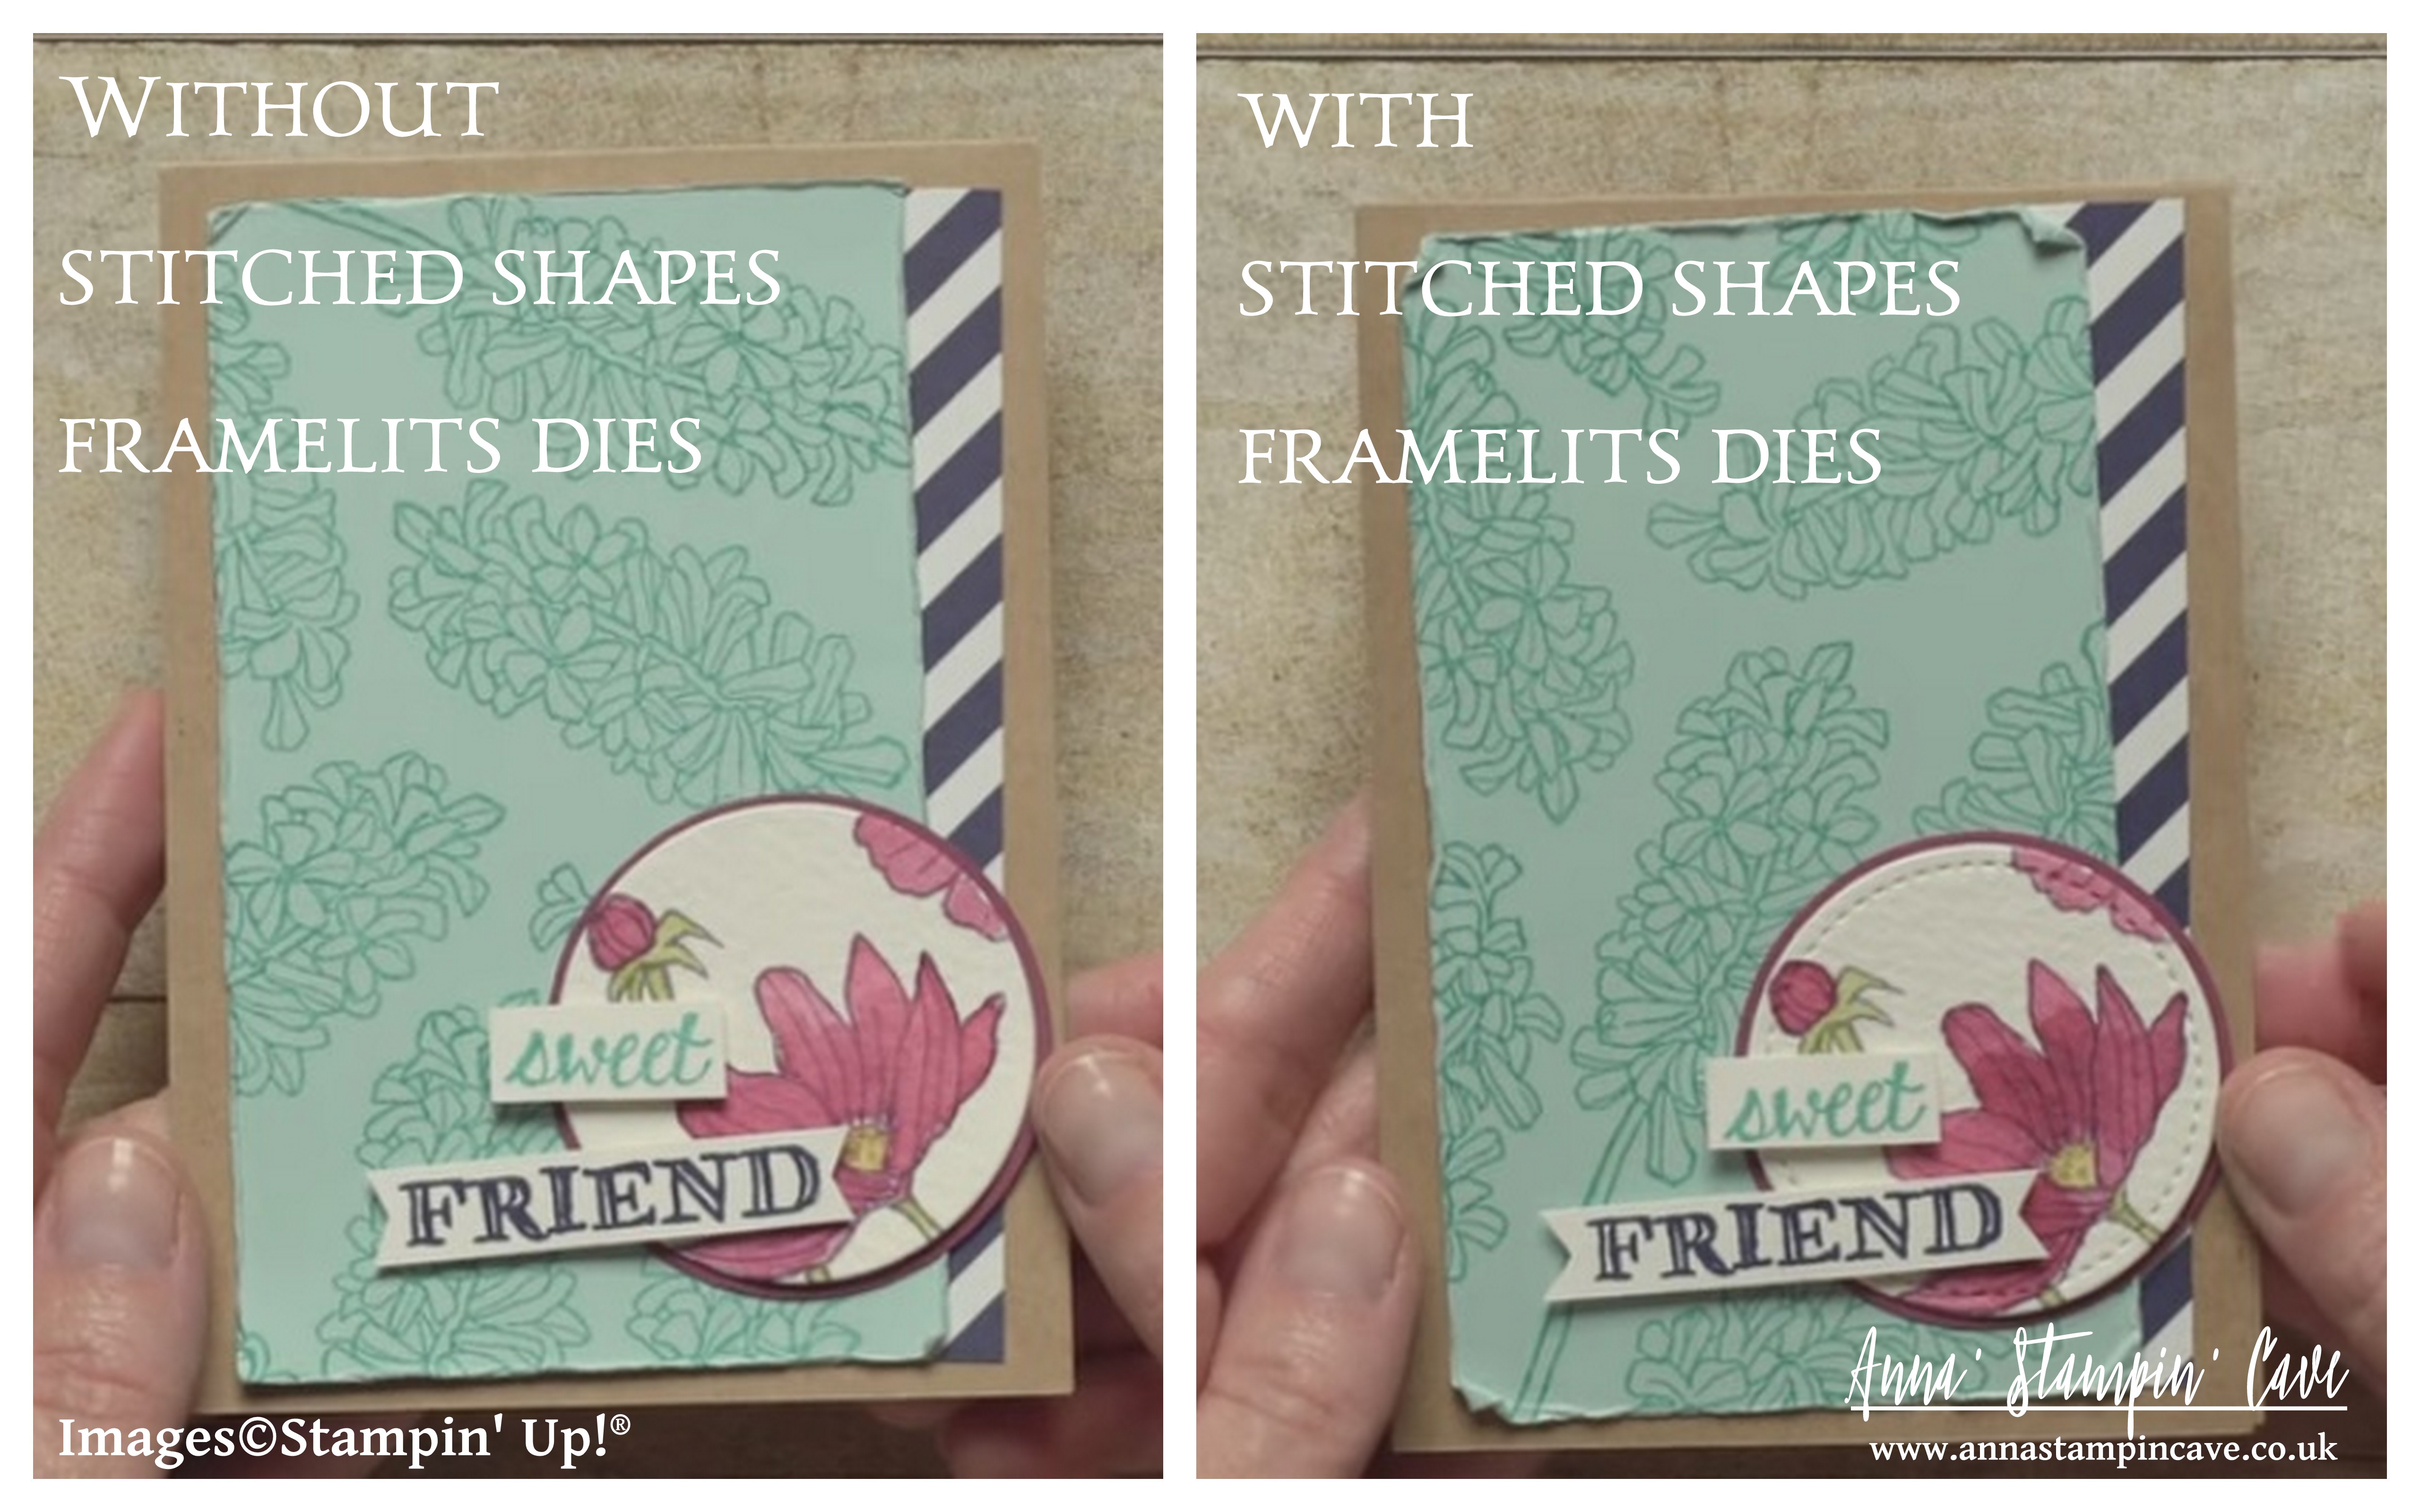
Not only stitches are a classic trend, they illustrate the quality, precision, and extra care is taken when creating a piece. Giving a stitched gift shows just how much you value that relationship.

Now you have the opportunity to purchase Stitched Shapes Framelits ahead of their official release in the 2017-2018 annual catalogue and get 25% off coordinating stamp sets.

With Stitched Shapes Framelits you can make paper stitches in seconds, turning any project into one that is stitched from the heart.

And there’s more great news…although the 25% off stamps sets ends 30 November, you will still be able to get the Stitched Shapes Framelits after that date.

anna-stampin-cave-stitched-shapes-framelits-dies-by-stampin-up
25% off stamps sets ends 30 November. I will post all the stamps sets with clickable images and links at the very end of this post

anna-stampin-cave-stitched-shapes-framelits-dies-by-stampin-up

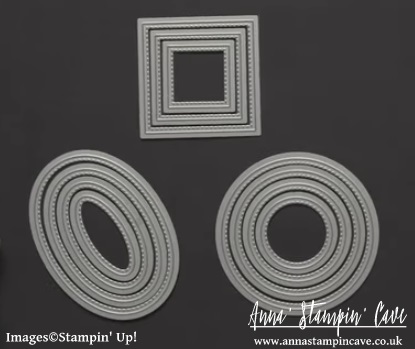
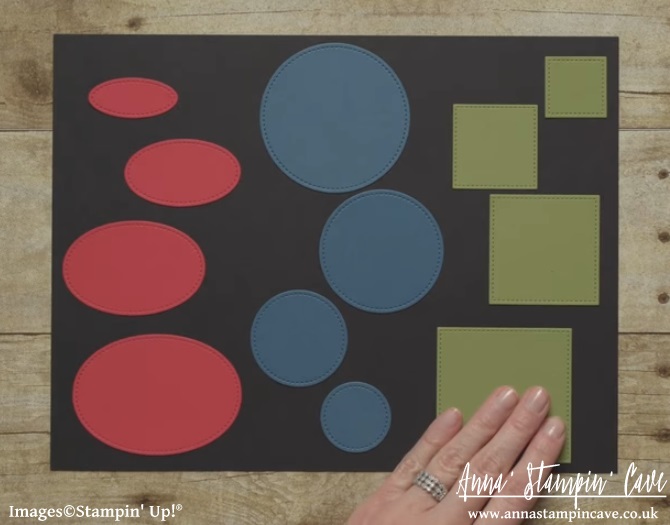
There are 12 pieces all together in the Stitched Shapes Framelits Dies. You get 4 each of the squares, circles, and ovals.

stampin-up-stitched-shapes-framelits-dies-2

They are sized for the stamped images that you tend to use the most.

stampin-up-stitched-shapes-framelits-dies-3

The stitched shape sits approximately 1/6″ from the edge of the cutout, making the stamp-able dimensions roughly 1/8″ smaller than the cut-out.

Here are all the sizes:

Squares
1-3/16”
1-5/8”
2-1/8”
2-5/8”

Circles
1-3/8”
1-7/8”
2-3/8”
2-7/8”

Ovals
1-3/4” x 13/16”
2-1/4” x 1-5/16”
2-3/4” x 1-13/16”
3-1/4” x 2-5/16”

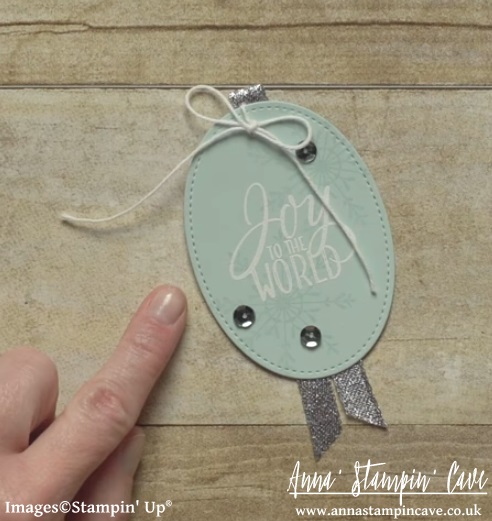
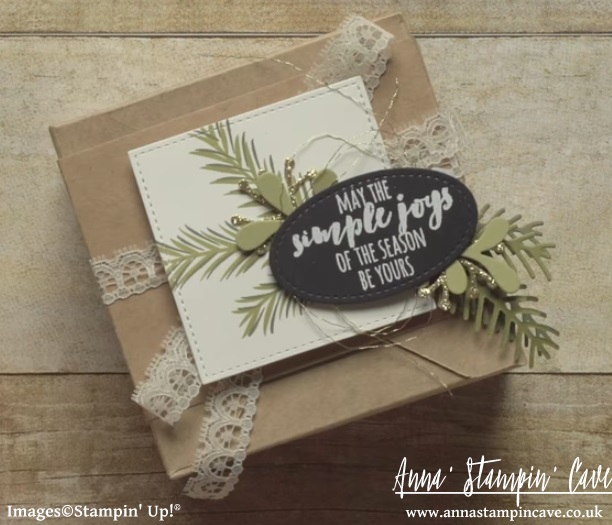
Here are few of the projects from Stampin’ Up! to showcase the versatility of Stitched Shapes Framelits Dies.

stitched-shapes-framelits-dies-by-stampin-up

stampin-up-stitched-shapes-framelits-dies

stampin-up-stitched-shapes-framelits-dies-4

Stampin' Up! Stitched Shapes Framelits Dies 7.jpg

Stitched Shapes Framelits Dies are not reserved for cardmaking only…

stampin-up-stitched-shapes-framelits-dies-5

…and here’s a close up

Stampin' Up! Stitched Shapes Framelits Dies 6.jpg

Wildflower Fields Fridge Mini Calendars

Wildflower Fields Fridge Mini Calendars

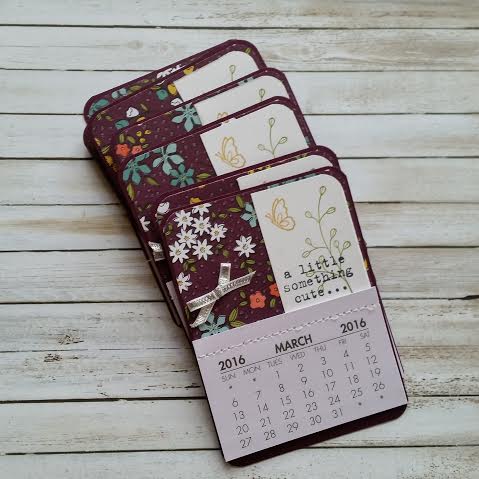
Wildflower Fields Fridge Mini Calendars - Blackberry Bliss

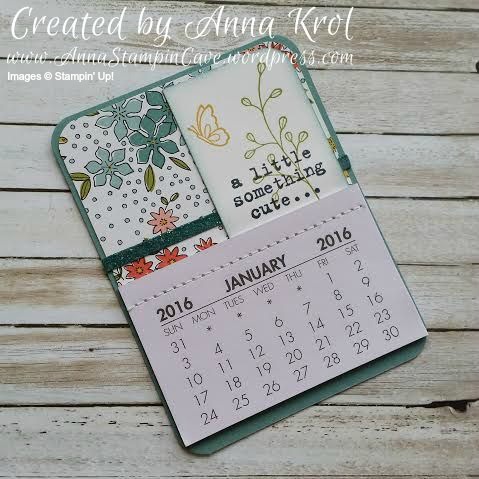
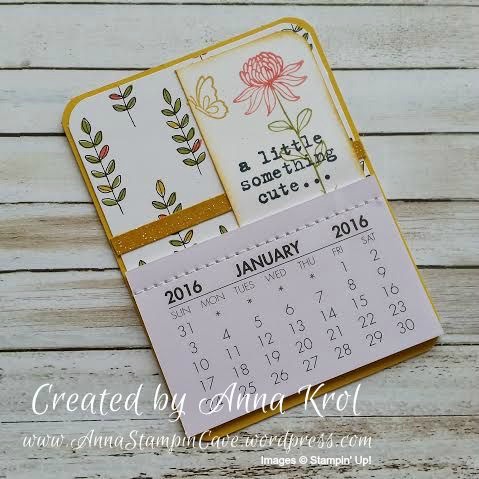
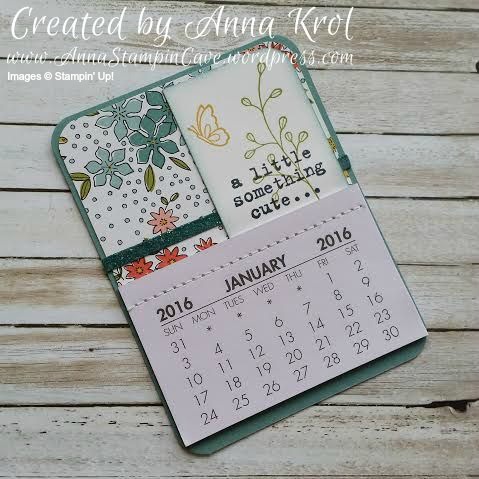
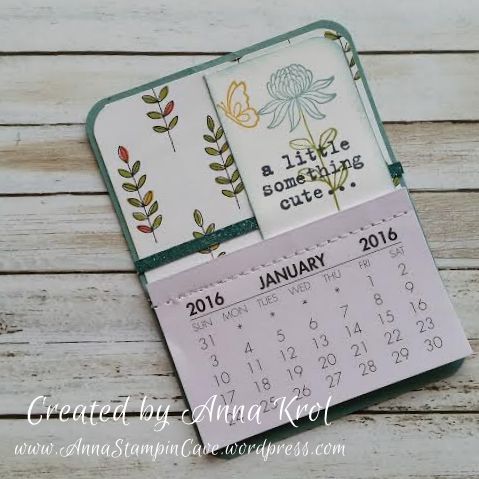
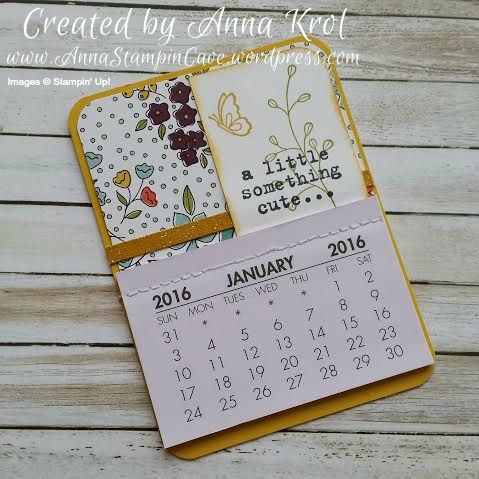
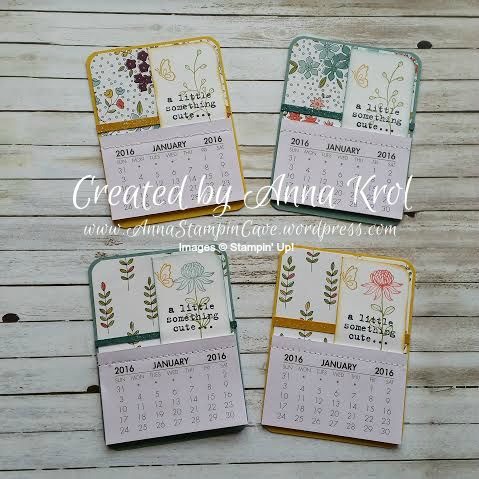
Good evening everyone. A few days ago, on my facebook page,  I’ve posted some fridge mini calendars I’ve made as a thank you gifts for my customers. But they were such a hit that I thought I will make a blog post, to show how to make them. Just a warning, it’s gonna be picture heavy 😉

Wildflower Fields Fridge Mini Calendars - Blackberry Bliss 2

I’ve bought these mini calendars on eBay while ago, but due to chronic fatigue I just couldn’t push myself to sit down and craft – maybe except for the cards once in a while. But I was wondering about customers gifts the other day and had a lightbulb moment – why not make cute magnetic fridge calendars?! Each calendar measures approx 2-7/8″ x 1-7/8″, and on their size, I’ve based my design.

Wildflower Fields Fridge Mini Calendars - Instructions 1

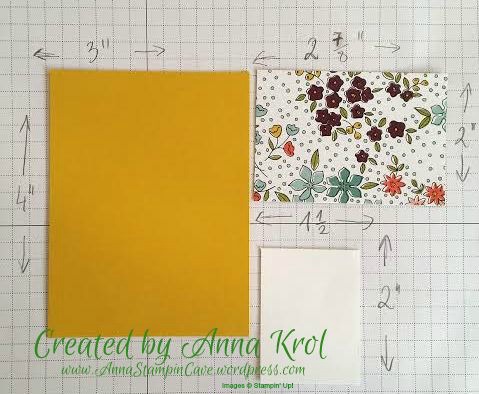
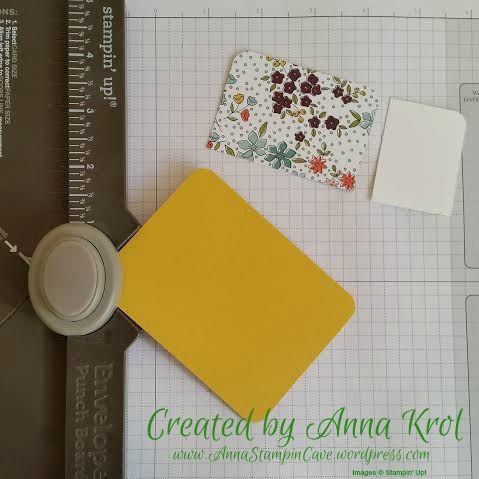
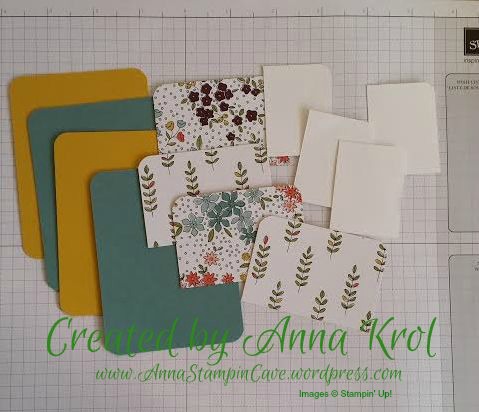
The base for my calendar measures 3″x 4″ – here I’ve used Hello Honey. Designer Series Paper measures 2-7/8″x 2″ and Whisper White piece for stamping measures 1-1/2″x 2″. I rounded all the edges of my base, top edges of DSP and right top corner of Whisper White. I’ve used my Envelope Punch Board to do so, but you could use the corner rounder punch if you have one.

Wildflower Fields Fridge Mini Calendars - Instructions 2 Wildflower Fields Fridge Mini Calendars - Instructions 3

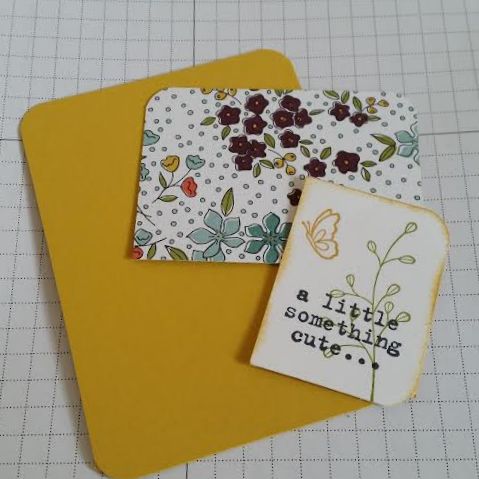
I stamped “a little something cute…” sentiment from Something To Say stamp set on my Whisper White pieces. Next, I stamped floral images from Flowering Fields stamp set. I just love this set! Don’t forget that this beautiful stamp set you can earn free with every £45 purchase during Sale-a-bration.

instrukcje

I’ve used Hello Honey for butterflies, Old Olive for stems and leaves, and Lost Lagoon and Calypso Coral for flowers. I’ve used ink pads as well as Stampin’ Markers to do my stamping. I have to say here, I love that all Stampin’ Up’s Designer Series Papers got all coordinating colours listed at the back of the paper pack. It makes creating so much easier if you don’t have to work out which colours to use. I also sponged stamped panels, so they stand out nicely from the background.

Wildflower Fields Fridge Mini Calendars - Hello Honey 2 Wildflower Fields Fridge Mini Calendars - Lost Lagoon

Wildflower Fields Fridge Mini Calendars - Lost Lagoon 2 Wildflower Fields Fridge Mini Calendars - Hello Honey

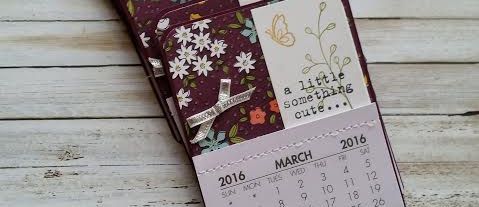
To embellish my Blackberry Bliss calendars I’ve used Silver 1/8″ Ribbon as it looked pretty neat on a dark background. But it didn’t work as good on the light one. So I cut “skinny” strips of cardstock in Lost Lagoon and Hello Honey, smooshed Versamark over them and heat embossed with Iridescent Ice Embossing Powder. I love this gentle shimmer.

Wildflower Fields Fridge Mini Calendars - Instructions 5

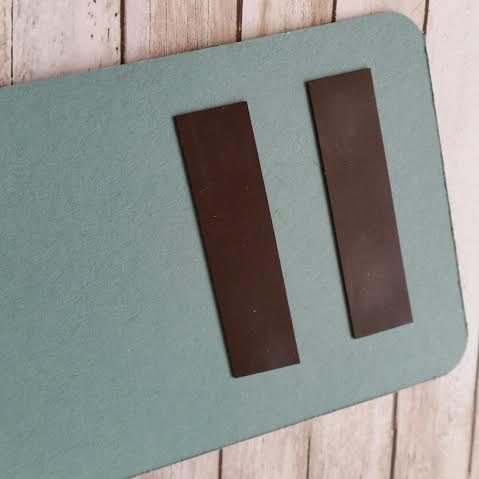
I assembled my calendars using Tombow glue. I also added two strips of a magnet at the back of each one.

Wildflower Fields Fridge Mini Calendars - Lost Lagoon & Hello Honey

I really hope you like my little project and that you give them a go. Or maybe you have different ideas to use these little calendars for? I would love to hear from you!

Have a blessed day,