Negative Die-Cutting

Anna’ Stampin’ Cave – Negative Die-Cutting


Hello everyone and welcome! Today I’ve got for you super cool & easy technique to try out: negative die-cutting. Just a reminder: each week we are using Ronald McDonald House stamp set ‘My Hero’.
anna-stampin-cave-my-hero-stamp-set-with-negative-die-cutting

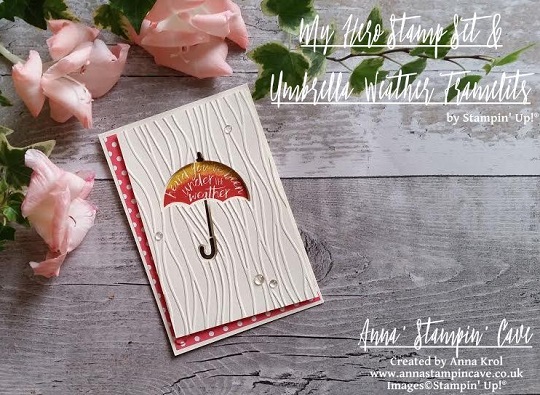
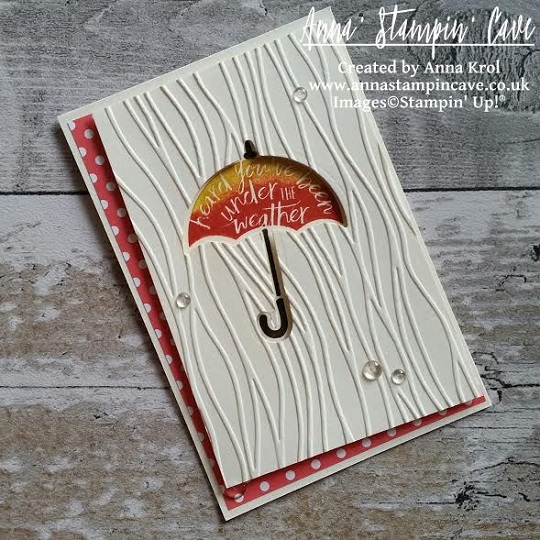
For today’s project, I’ve decided to use this lovely umbrella image. To create my card I started with a Very Vanilla card base and a Very Vanilla panel, slightly smaller than my base. First, I arranged the layout of my card using the Umbrella Weather Framelits. When I was happy with the placing, I die cut the umbrella first and the handle next, from my panel. But instead of using the die-cut piece on the card (as we usually do, don’t we?), I’ve used the negative image. Savvy tip: Don’t throw your die cuts away. You can use them for your next project.

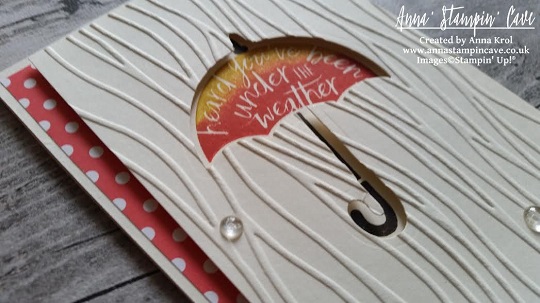
I took my panel, placed it on the card base without adhering it, and I stamped the umbrella and the handle through a die cut holes. Stamp-A-Ma-Jig ( I love this tool!!!) was a big help to position my stamps perfectly. To create an ombre effect on umbrella image, I coloured the stamp with Crushed Curry and Tangerine Tango Stampin’ Markers (Crushed Curry to the top and Tangerine Tango in the middle). And, because I don’t own the 2015-2017 In Colour Stampin’ Markers, I carefully dabbed Watermelon Wonder ink pad to the bottom of the stamp.
my-hero-stamp-set-with-negative-die-cutting-2

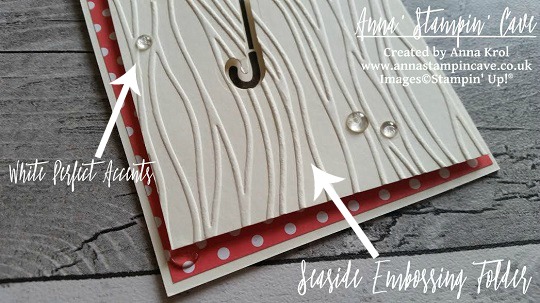
When I was done with the stamping, I trimmed my layer at slightly ‘wonky’ angles, and run it through the Big Shot with a Seaside embossing folder. This folder is intended to imitate the waves, but if you turn it aside, it looks like rain streaks on a window, which is totally cool 🙂

I took a piece of Watermelon Wonder DSP from 2015-2017 In Color Designer Paper Stack (there are four different designs to choose from, but I’ve gone for dots). It was slightly bigger than my top layer, but I  didn’t want to use it all on my card. I only wanted it to peek from underneath my top layer where the ‘wonky’ angles were. So I measured it up, trimmed the piece and adhered it to the base. next, using dimensionals, I’ve added the top layer.
my-hero-stamp-set-with-negative-die-cutting

I decided not to use any additional sentiment on my card, as I think the one on the umbrella says it all. To embellish the card I’ve used White Perfect Accents. But hey, you say, these are clear, right? But did you know that you can peel off the white, sticky backing from your  White Perfect Accents, and you get these super awesome clear, perfectly round embellishments?! It’s cool or what?! But, of course, once you peel the backing off, you need to use glue to adhere them.
pootlers-design-team-week-2

So, did you liked my project?! I hope I inspired you to give this technique a go. It’s really cool and you will be hooked in no time!

Thank you for stopping by and have a blessed day,

Pinkies Annual Catalogue Blog Hop – Tuscan Vineyard

blog hop logo

Thank you for joining us on another Pinkies Blog Hop! We’re showcasing lots of gorgeous projects using products from the new Stampin’ Up!® Annual Catalogue. Simply use the buttons at the end of each post to keep hopping!

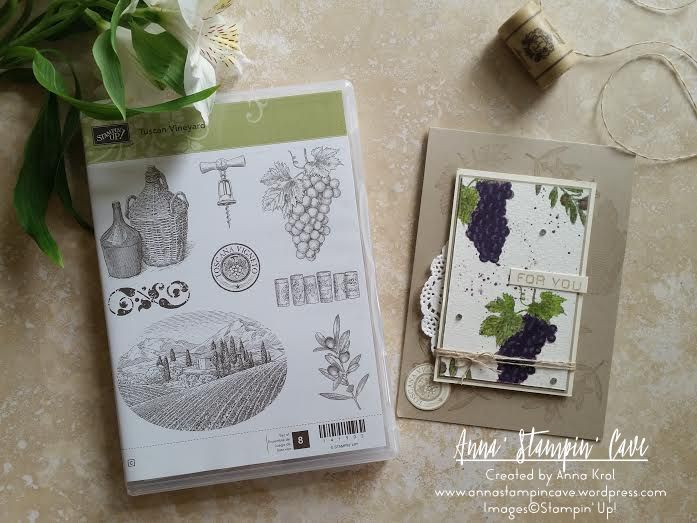
Tuscan Vineyard Stamp Set

When Chris, my husband, saw Stampin’ Up! Tuscan Vineyard Stamp Set he said: “we have to have it” ;). In our home, we love to have a glass of good wine on special occasion, or when friends come over. We also make our own wine from the fruits of our garden. Chris (my husband) is very passionate about it. When he was young he’s spent some time on a French vineyard, and he fell in love with the art of making wine.

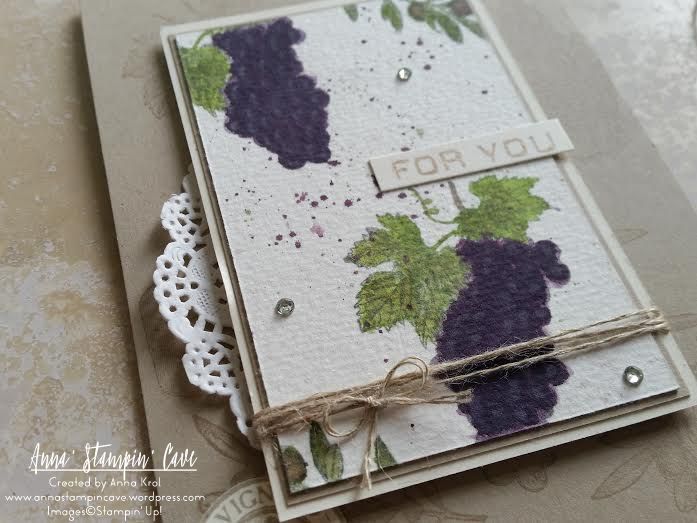
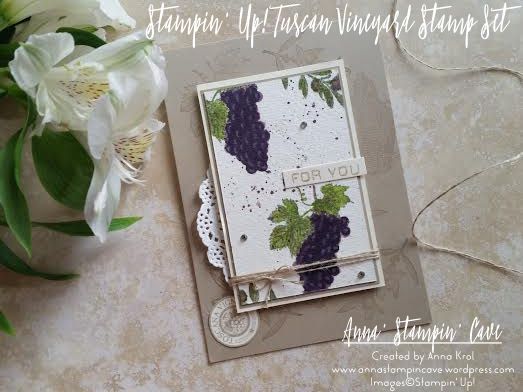
Tuscan Vineyard for you card

I think this set is perfect for collages, but I decided to use my favourite technique – watercolour. First, I randomly stamped the base of my card using various images from the stamp set. I used Crumb Cake cardstock and ink pad for tone on tone look. Next, I took a piece of watercolour paper and I stamped bunches of grapes and olive branches using Basic Grey Archival ink and water coloured them with an aqua painter. For fine lines, I’ve used Blender Pens.

Tuscan Vineyard for you card - close up

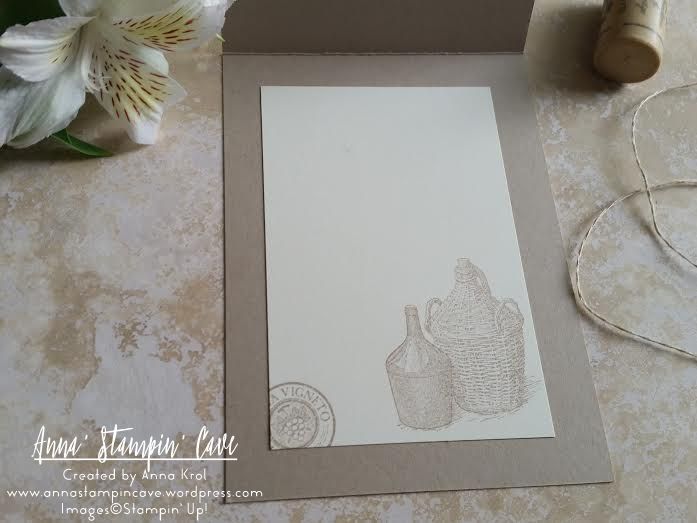
When I was happy with the results I made some random splotches with Perfect Plum and Wild Wasabi. To assemble my card I backed my watercolour panel with a piece of Crumb Cake and Very Vanilla. I wrap linen thread around the panel, added a piece of new doily underneath, and adhere it to the card base using dimensionals. I stamped round image from the same set, that reads Toscana Vigneto on a piece of Very Vanilla and tucked it underneath the panel. Few rhinestones, simple sentiment, and my card was done. I also stamped inside of the card.

Tuscan Vineyard - inside of the card

I truly hope you enjoyed coming to my blog today and see my card. As always, if you wish to purchase any of the products I have used, simply click the images below to go directly to my online shop.

Now, be sure to hop along and see more inspiring projects. Your next stop is lovely Kim  go and see what she has made using the new products.

next

previous

Thank you for stopping by and have a blessed day! Product List

Aqua Painters

£15.50

Blender Pens

£10.75

Linen Thread

£4.25

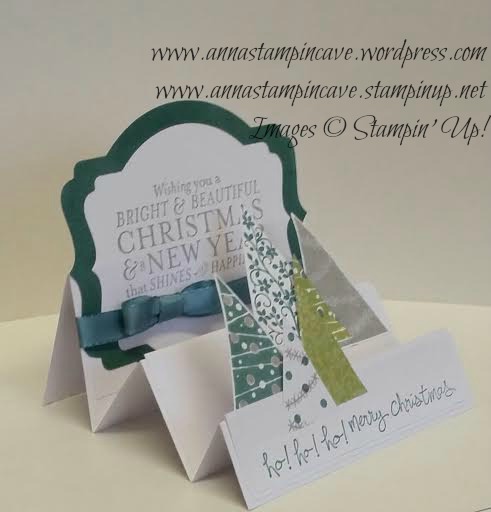
Stair Step Card With Festival of Trees

Good evening everyone. It’s Saturday – only week away from us moving a home! Yes, finally 🙂 There was so many things coming out in over a month that I thought it will never happen for us to moving hahaha. But finally everything gets into place. The whole new bathroom suite is waiting to be fixed, floor is bought, new soil pipe is on it’s place and the plumbing work will be finished on Tuesday. Plasterboards are nearly done as well – yay! I will tell you more in a coming week 🙂

Today’s project is not today’s for the true. It’s been waiting to be posted for few days now but always something get me distracted. But because I’ve got free hour or so I thought I will post it tonight 🙂

accordian card 2


I don’t have to tell you I love Festival of Trees by Stampin’ Up! Do I?! 😀 I absolutely adore this stamp set, and I will tell you it’s not the last project I will make using it 🙂

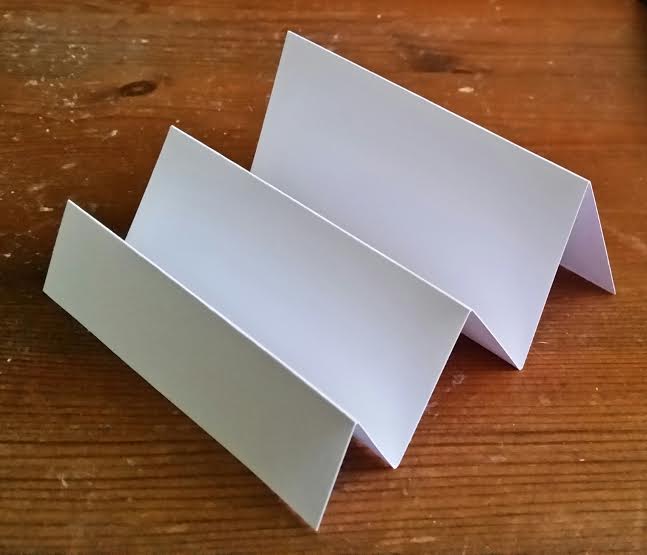
This is simple Stair Step Card. For the base you need piece of card stock that measure 9 x 4 1/8 inches (22.8×10.5 cm). Then score it at 1, 2, 3 4/8, 5, 7 inches  (2.5, 5, 8.9 , 12.8 and 17.8 cm) making “hills and valleys” same as on the picture:

accordian card 1

For two first “stairs” I cut two pieces of card stock that measures as follows: smallest 4 x 1″ (10 x 2.5 cm) and medium piece 4 x 1.5″ (10 x 3.8 cm). I glued them to the base 1/16″ higher then each “stair” starts. In imperial it’s around 2 mm higher. For the last stair I’ve cut the piece of cardstock which measure 4 x 3 4/8″. One half of that piece I run through the Big Shot using the biggest Deco Label. Then I took a piece of Lost Lagoon cs slighty wider and run it through the Big Shot again using the same size Deco Label to make a frame for the sentiment.

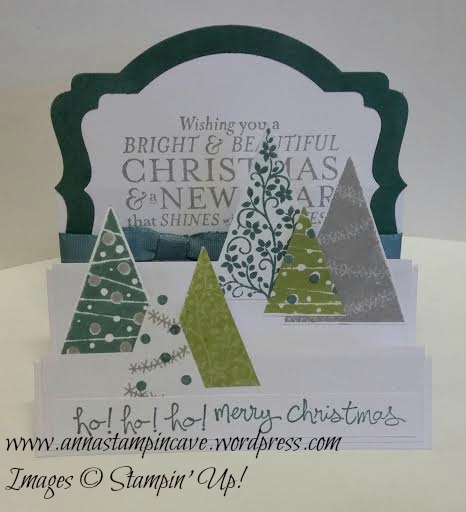
I’ve stamped  six different trees using Lost Lagoon, Smoky Slate and Pear Pizzazz. I used different tree designs from Festivals of Trees. Also, for the “chain” stamp, I’ve used Versamark pad making so called resistant stamping technique where you stamp the details with Versamark and then stamp solid image on the top. The image stamped as first will resist the ink from second stamping 🙂 Then I’ve cut all the trees with coordinating punch. At the end I used the trimmer ( you can use scissors too) to shorten all of the trees so each one have different lenght now. I’ve attached them to the card with Tombow glue: three on the smallest stair and three on the medium one.

I took the piece of Whisper White (which I’ve run through the Big Shot before) and using stamp-a-ma-jig and Smoky Slate I’ve stamped the sentiment from Bright & Beautiful stamp set.

accordian card 3

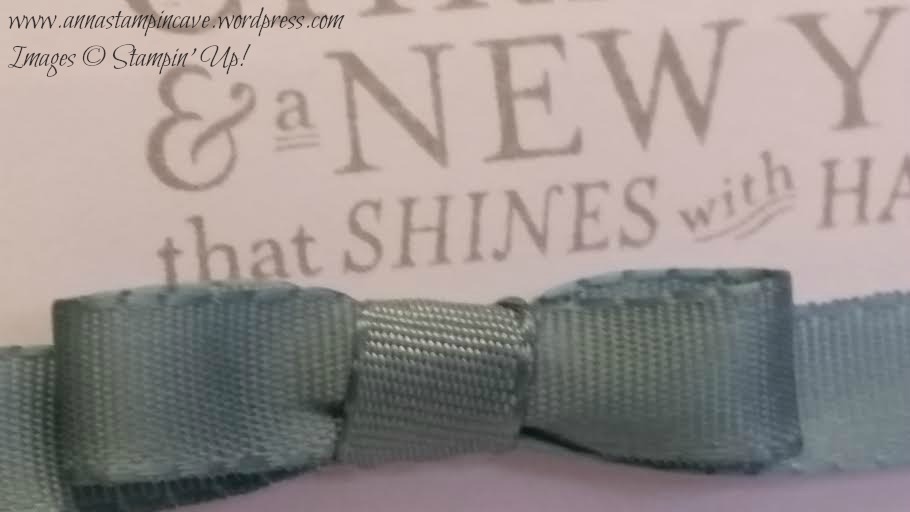
Then I’ve glued the frame and a piece of Lost Lagoon Silky Taffeta Ribbon. To add more interest I’ve tied a little bow. Now I could glue it all to the card. It really looked good. But something seemed to be missing. So I took a strip of Whisper White and I’ve stamped “ho-ho-ho” and “merry christmas” from Good Greetings. For this sentiment I’ve used Lost Lagoon. I glued that strip to the first stair just below trees.

accordian card 4

Et voila – the card is done 🙂 I really think this stamp set is awesome. And even though for this card you can use different colours, different designs of trees or even different sentiments, but it’s still pretty awesome card! Don’t you think?! 🙂 If you like it (or not 😉 ) please leave a comment below.

Thank you for stopping by,

Super Cute Card in a Box For a Baby Using Something for a Baby by Stampin’ Up!

OMG! It has been ages since my last post and honestly, I’ve missed you all terribly! On a sad note, it seems like my hands and legs are giving up and MS taking it’s toll slowly. On a positive note though I’m not giving up just yet! In a past week I’ve managed to make some fun projects, but today I want to share with you a card in a box I’ve made while back for our new family addition: my husband’s nephew Franio. He’s our little star and true miracle but it’s a long story I won’t share on here. And even though he came to this world in August I just recently seen Franio’s mummy and daddy to give them this special card.
3

Dimensions: card base is made with a piece of cardstock that measures 11-1/2 x 4-1/8 inches ( half of A4). Here I’ve used Crumb Cake but you can use any colour really. Score the base at 3-7/8, 5-1/2, 9-3/8 & 11″ on the long side. Then score at 2-1/8 on a short side. You will also need two extra pieces of cardstock for the inserts. Each piece should measure 4-7/8 x 3/4″ and need to be scored at 1/2″ on each side.

2

Dotted DSP I’ve used is from Subtles DSP pack which is amazing! 40 sheets high quality 12×12″ double-sided designs in 10 colours for 19.50! Bargain! But let us get back to the project. DSP goes only on front and side panels. on the back panel and reverse (not on the pictures) I’ve used pieces of Whisper White stamped randomly using hearts, flowers and safety pins from Something For A Baby set. All DSP panels and base of the card has been sponged either with Crumb Cake or Pool Party ink pads. And now the fun part! I took all of the stamps (except for a bib) from Something For A Baby stamp set and assigned ( wow sounds too serious 😉 ) the colours for each one – just to avoid a mess later on. The colours I’ve used are as follows: Crisp Cantaloupe, Crumb Cake, Pool Party, Smoky Slate, Daffodil Delight and Pistachio Pudding. But hey, if you spot different colour please let me know as I may forget all of the colours used by now.

1

Every shape has been stamped and then cut out using coordinating Baby’s First Framelits Dies. It’s so much easier than fussy cut everything. But you’re probably wondering how I’ve made the stack of rings. I’ve simply coloured each ring in a different colour using Stampin’ Markers and then stamped on the piece of whisper white, just like the other shapes. Same technique with Stampin’ Markers I’ve used for the name using Stampin’ Up and Project Life stamp set Day to Day and Stamp-a-ma-jig to line up letters perfectly. The banner is made with the same stamp set. I’ve used a piece of white core’dination paper from American Crafts just to add some extra dimension.

4

And now the easiest part: put the card together. All cut out pieces are assembled using either glue dots or dimensionals. For the socks and one of the safety pins I’ve used tiny straps of window sheet so the can keep “floating”. And that’s it! The card is finished. Oh, I forgot about little bow made with thick bakers twine!

If you like this project please leave a comment below. Thank you all so much for stopping by. Happy crafting,

The Rectangle Card in the Box using Stampin’ Up! goodies!

Hello hello hello! Today I want to share with you really lovely card in the box. But this one is slightly different than those you’ve probably seen already as it’s in the shape of a rectangle.

dla neila 1

For the base, you need a piece of cardstock which measures 11-1/2 x 4-1/8 inches ( half of A4). I’ve used Whisper White. Score the base at 3-7/8, 5-1/2, 9-3/8 & 11″ on the long side. Then score at 2-1/8 on a short side. You will also need two extra pieces of cardstock for the inserts. Each piece should measure 4-7/8 x 3/4″ and need to be scored at 1/2″ on each side. If I find a time I will add a template to make it easier to follow.

dla neila 3

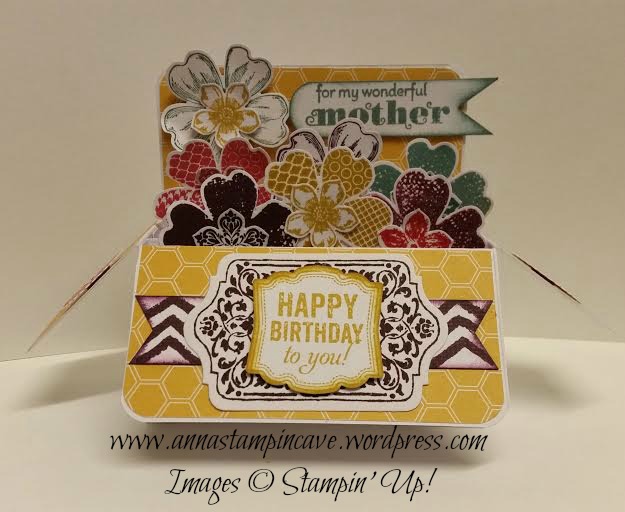
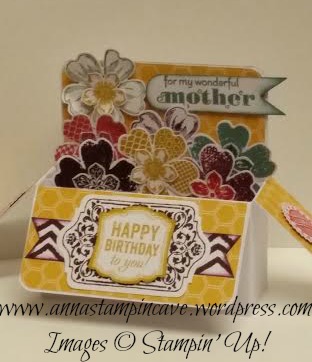
To decorate the box I’ve used beautiful paper from Moonlight DSP Paper Stack. It’s gorgeous design in new in-colour Hello Honey. For the flowers, I’ve used Petite Petals and Flower Shop stamp sets with coordinating punches. The colours I’ve chosen Blackberry Bliss, Hello Honey, Lost Lagoon and Strawberry Slush.

dla neila 2

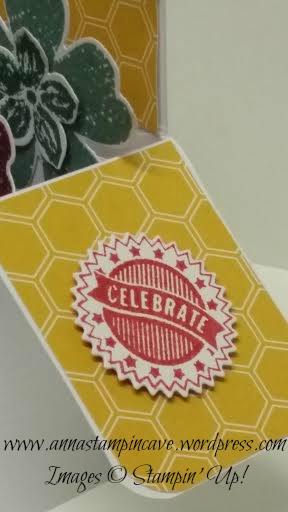
The main sentiment is from Label Love – stamped in Hello Honey and punched with Artisan Label Punch. As the backing for the sentiment, I’ve used Chalk Talk stamp set and framelits, and banner stamped with chevron design from Work Of Art. Both stamped in Blackberry Bliss. On the sides, you can see tiny “celebrate” circles from Starburst Sayings in Strawberry Slush. The other sentiment: “for my wonderful mother” comes from one of our retired stamp sets: Delightful Dozen. Truly hope you like this project.

Thank you for stopping by,